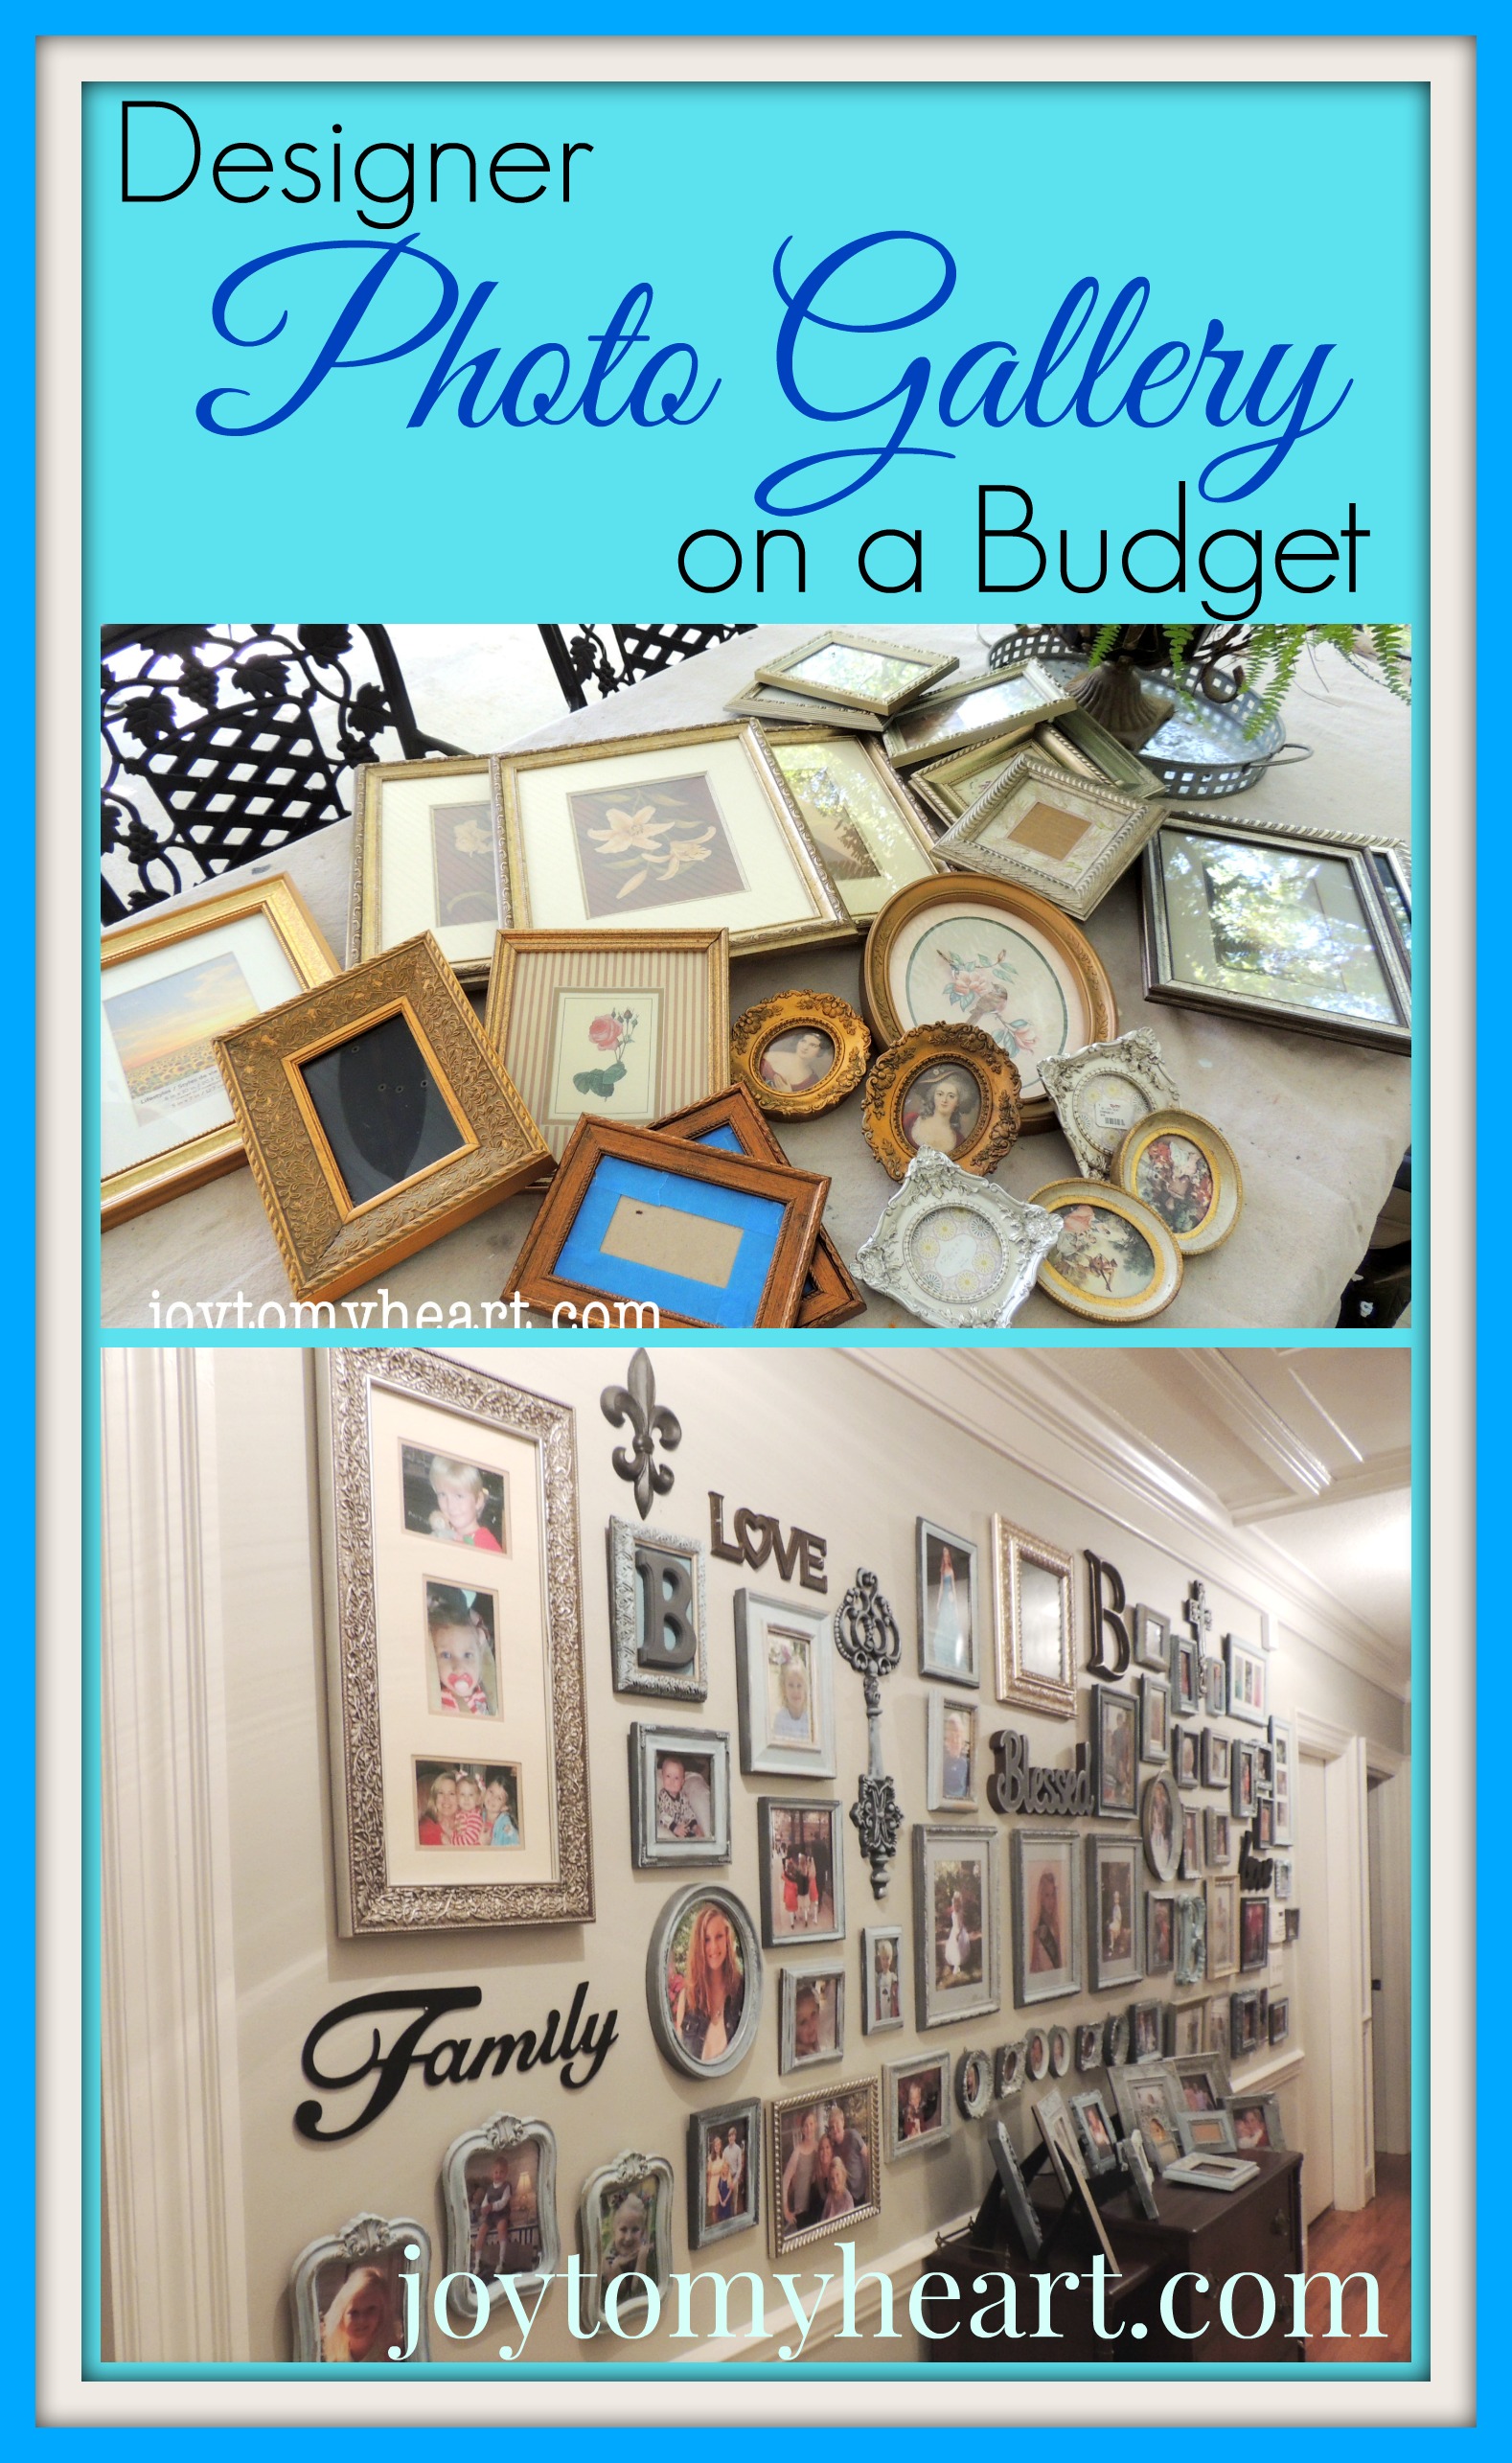
Buying frames can be hard on a budget…especially if you want to frame a lot at one time. However, there is a little known secret I’m going to share with you about how I did her whole 15 foot photo gallery and how you can have a designer photo gallery on a budgetˇ
Decide on Wall Space
First thing you’ll need is wall space. Even tho my daughter has a huge wall for a gallery, a small gallery can be just as impressive. So, don’t worry if your space is limited. Find the perfect place in your home and go for it!
Collect an Assortment of Frames
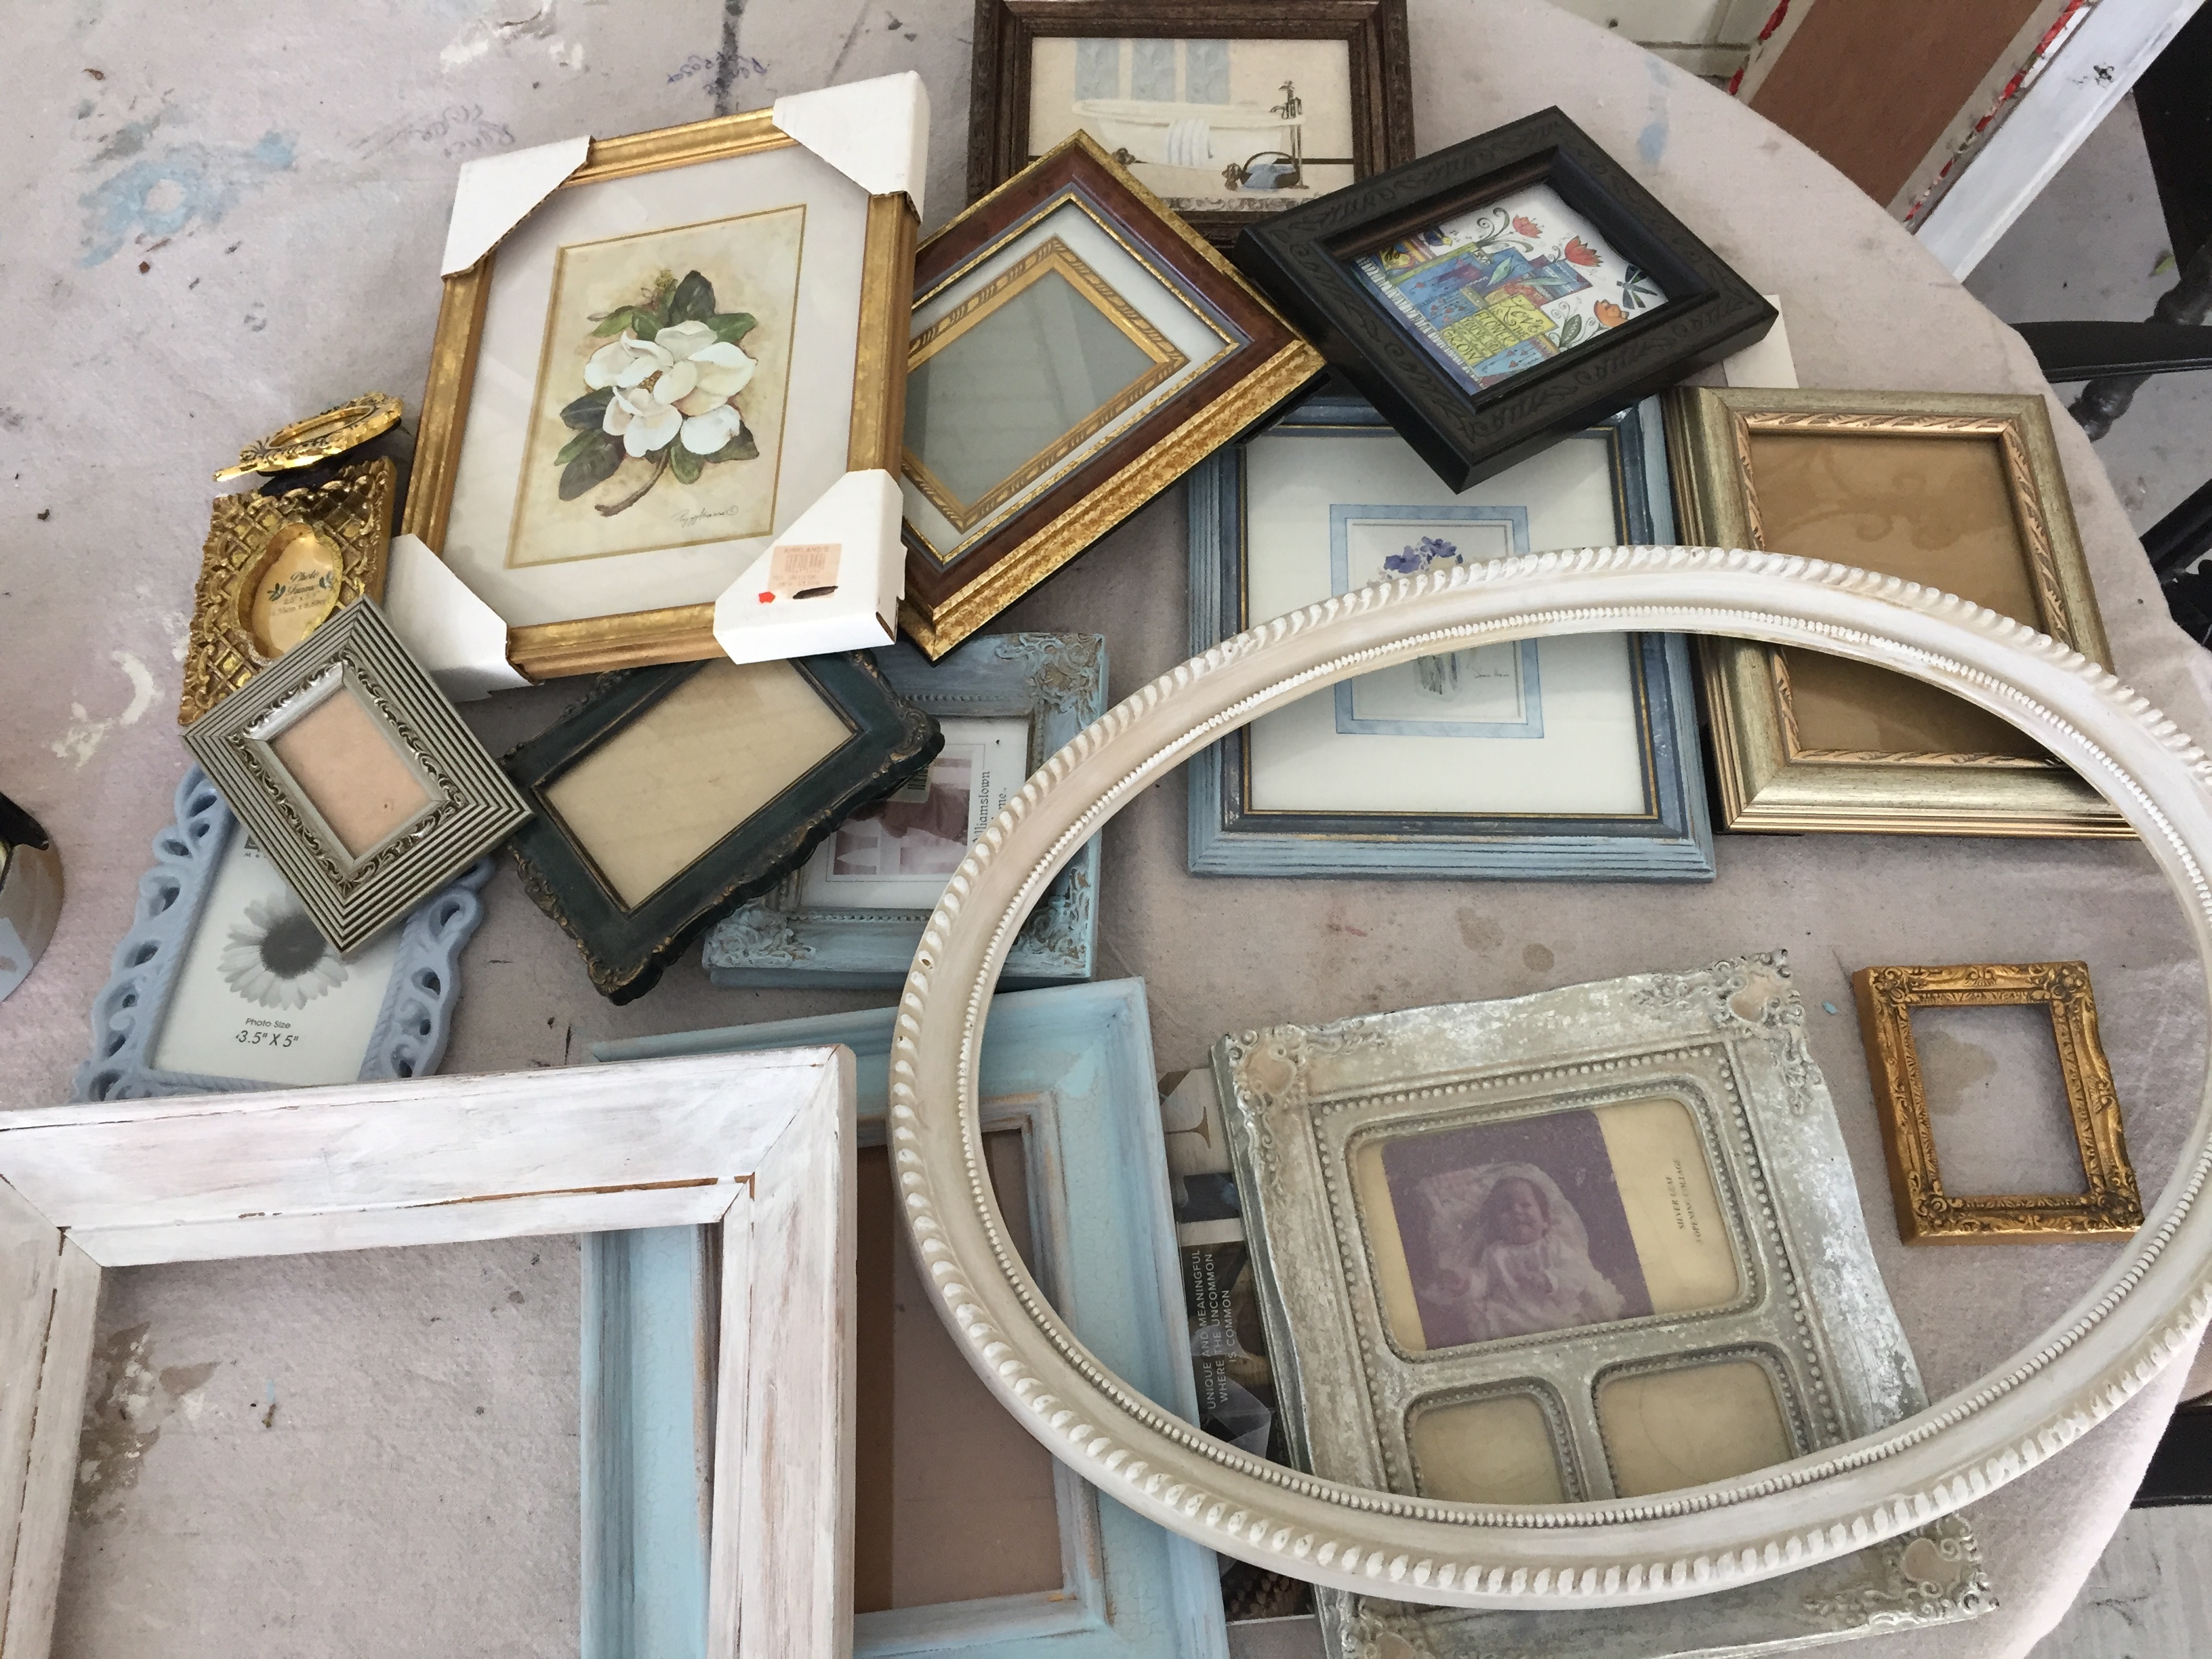
The next thing you’ll need are frames. Many multi-sized frames.

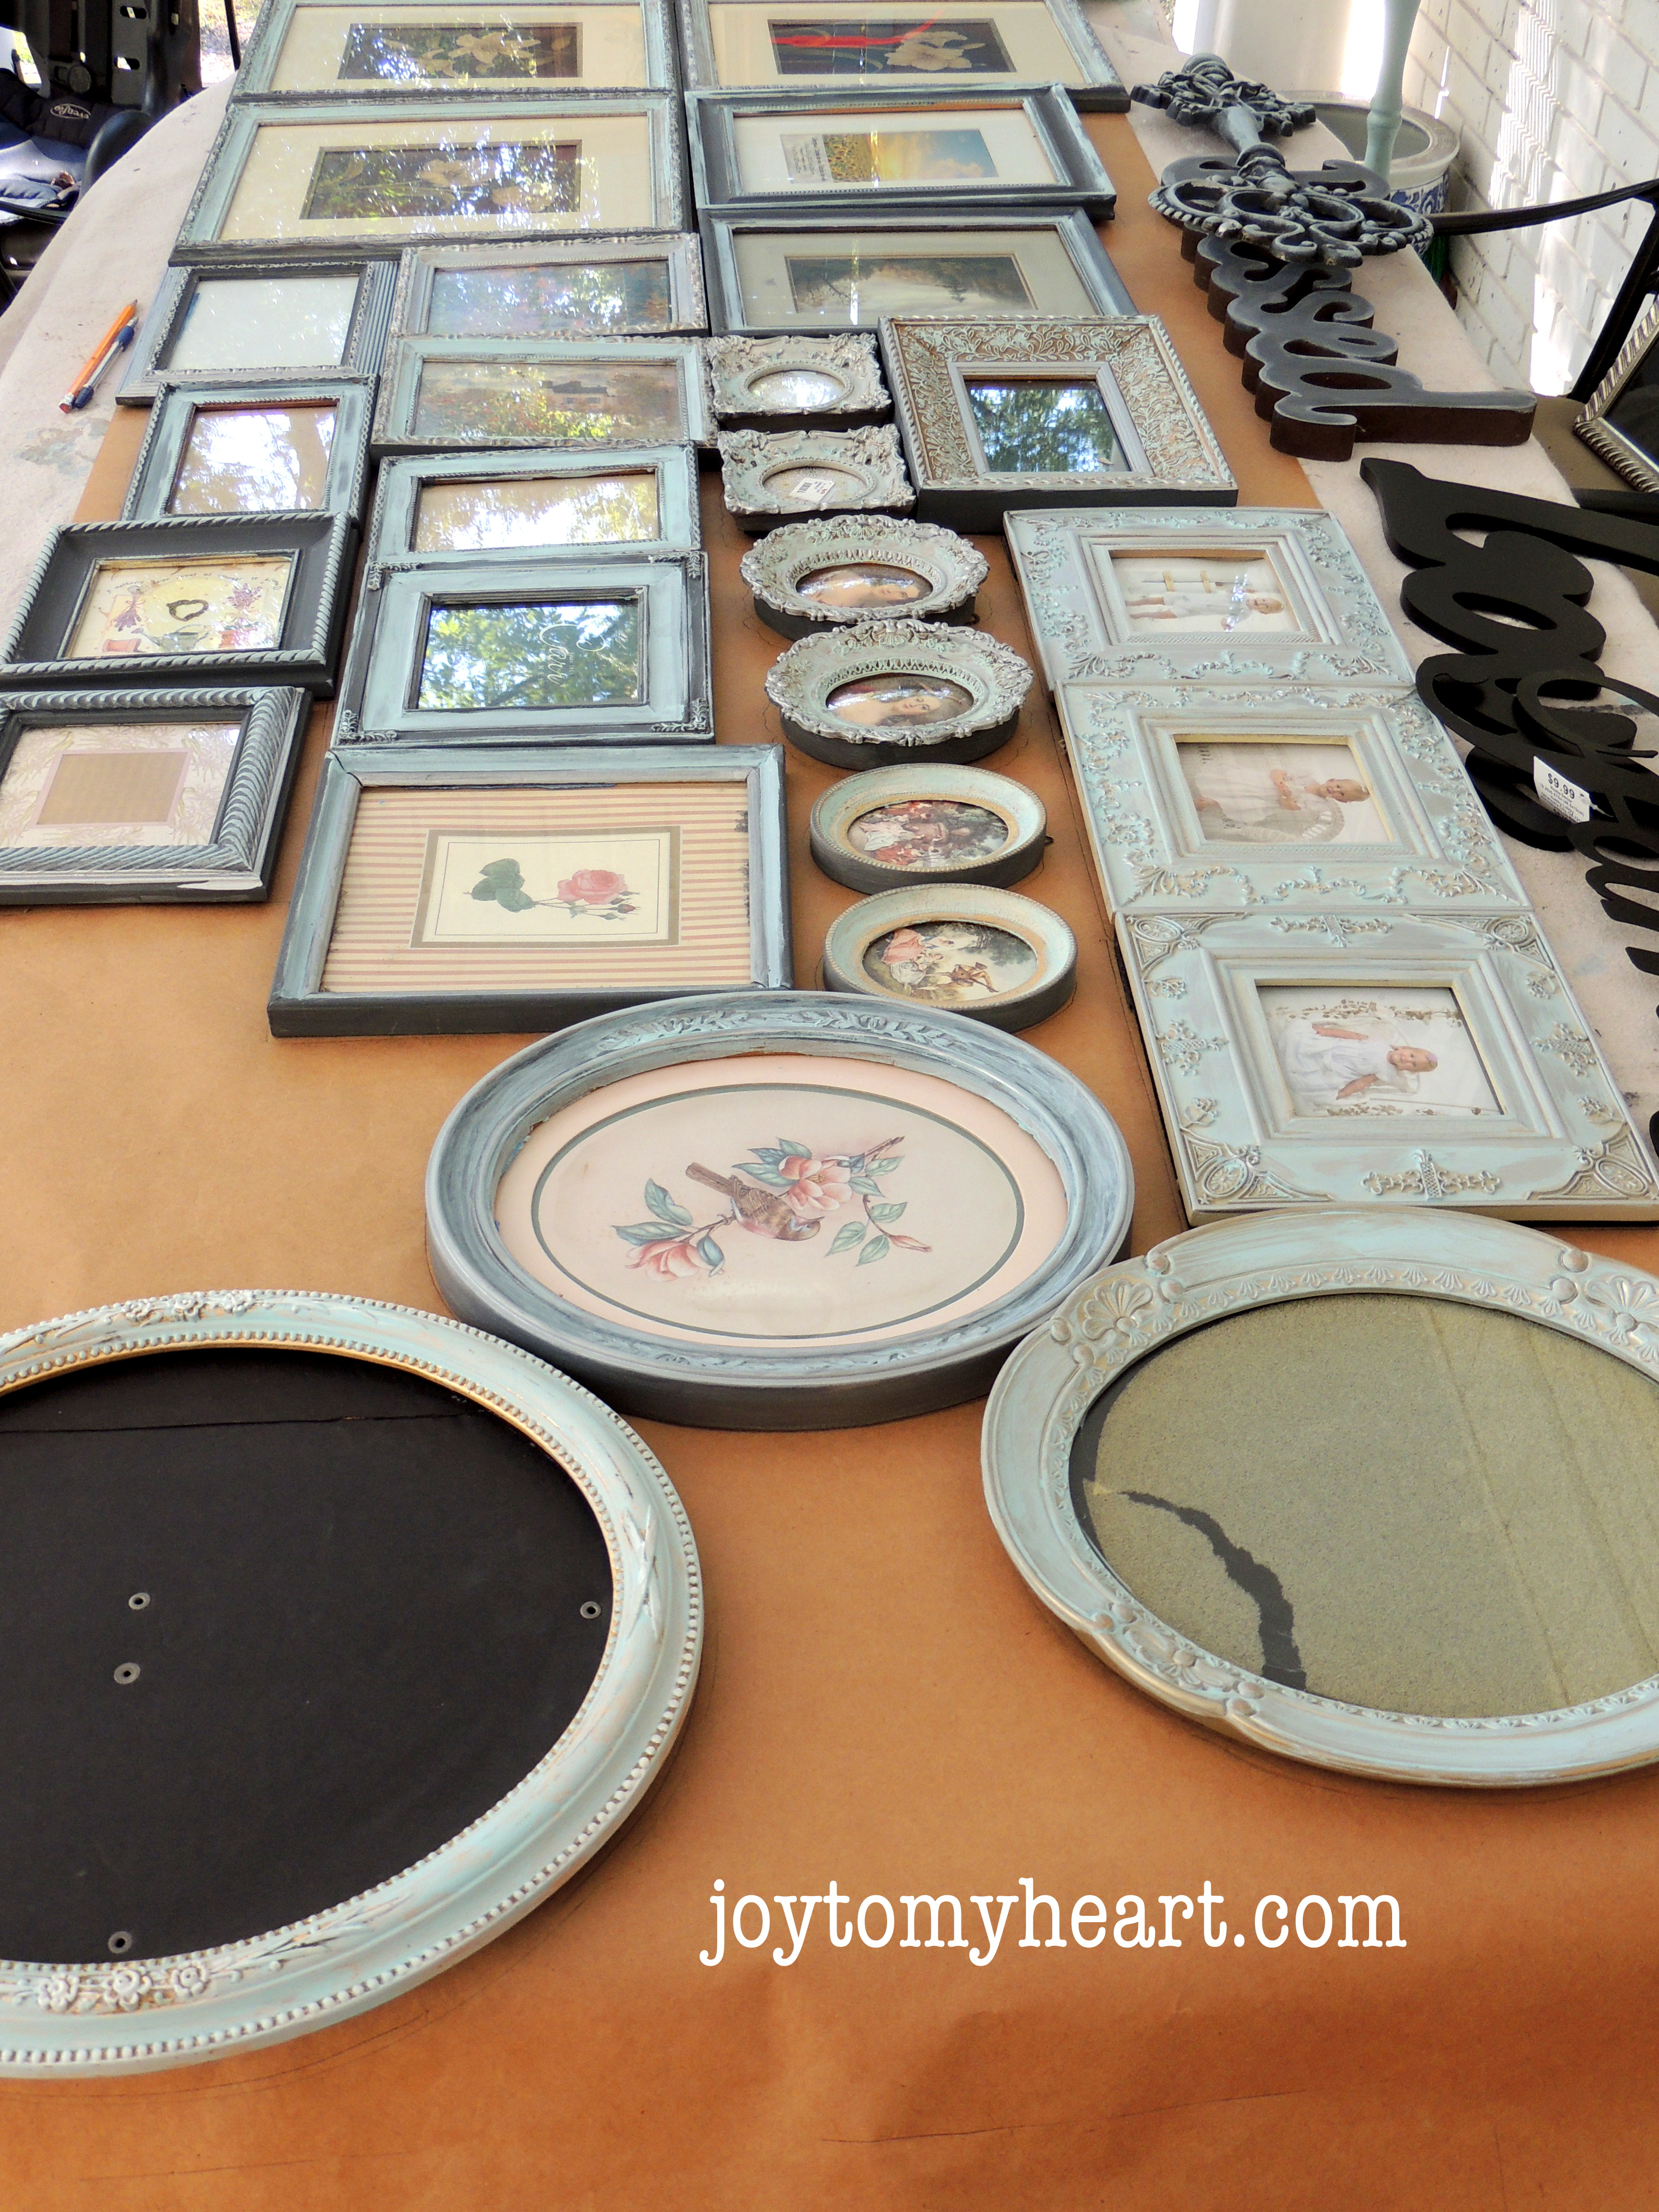
We’re doing this on a budget. Right? Here’s how to saved tons of money on frames. Once I decided to make a gallery, I began slowly collecting interesting frames to use. My secret: I bought all of the frames I used at Goodwill, Salvation Army and thrift stores. I bought some really nice frames. I bought some old wooden frames. I bought some down right ugly frames (that had good lines). I bought some beautiful frames. I bought some plastic frames that I’d never hang in my home, least not the way they were. I bought them because they had good lines or a design that I loved. I’d worry about them being plastic later. You can find some beautiful frames at very inexpensive prices at thrift stores. So start there.
See the large oval cream colored frame below? It’s cheap, thin plastic..and it was an ugly gold color. And it framed an ugly pastel print. Who, might I ask, is going to be touching your frames? So, see, once you frame your beautiful family portrait with it…they will never know.
It took me a while to collect enough, so go ahead and start making regular trips to your local thrift shops.
Don’t worry about making all the frames match, just yet…Look at the detail and if it’s a look you like we can deal with the color later. When I saw a frame that looked interesting or in a different size, I grabbed it. If the price bothered me, I didn’t buy it. The great thing is, you get to decide.
Decide on a Color for Your Gallery
A designer gallery requires some cohesiveness. The next thing I did was to paint the frames. My daughter has turquoise in her home and I wanted a color that carried that theme down the hall.
You decide what color you want for your gallery. Some use all gold frames, or only black or only silver. Or you may want to spray paint them all one color, say for a child’s room, like royal blue or red. You may want them to be dark stained wood. Whatever works in your space….there is no right or wrong color. You just want them to go together.
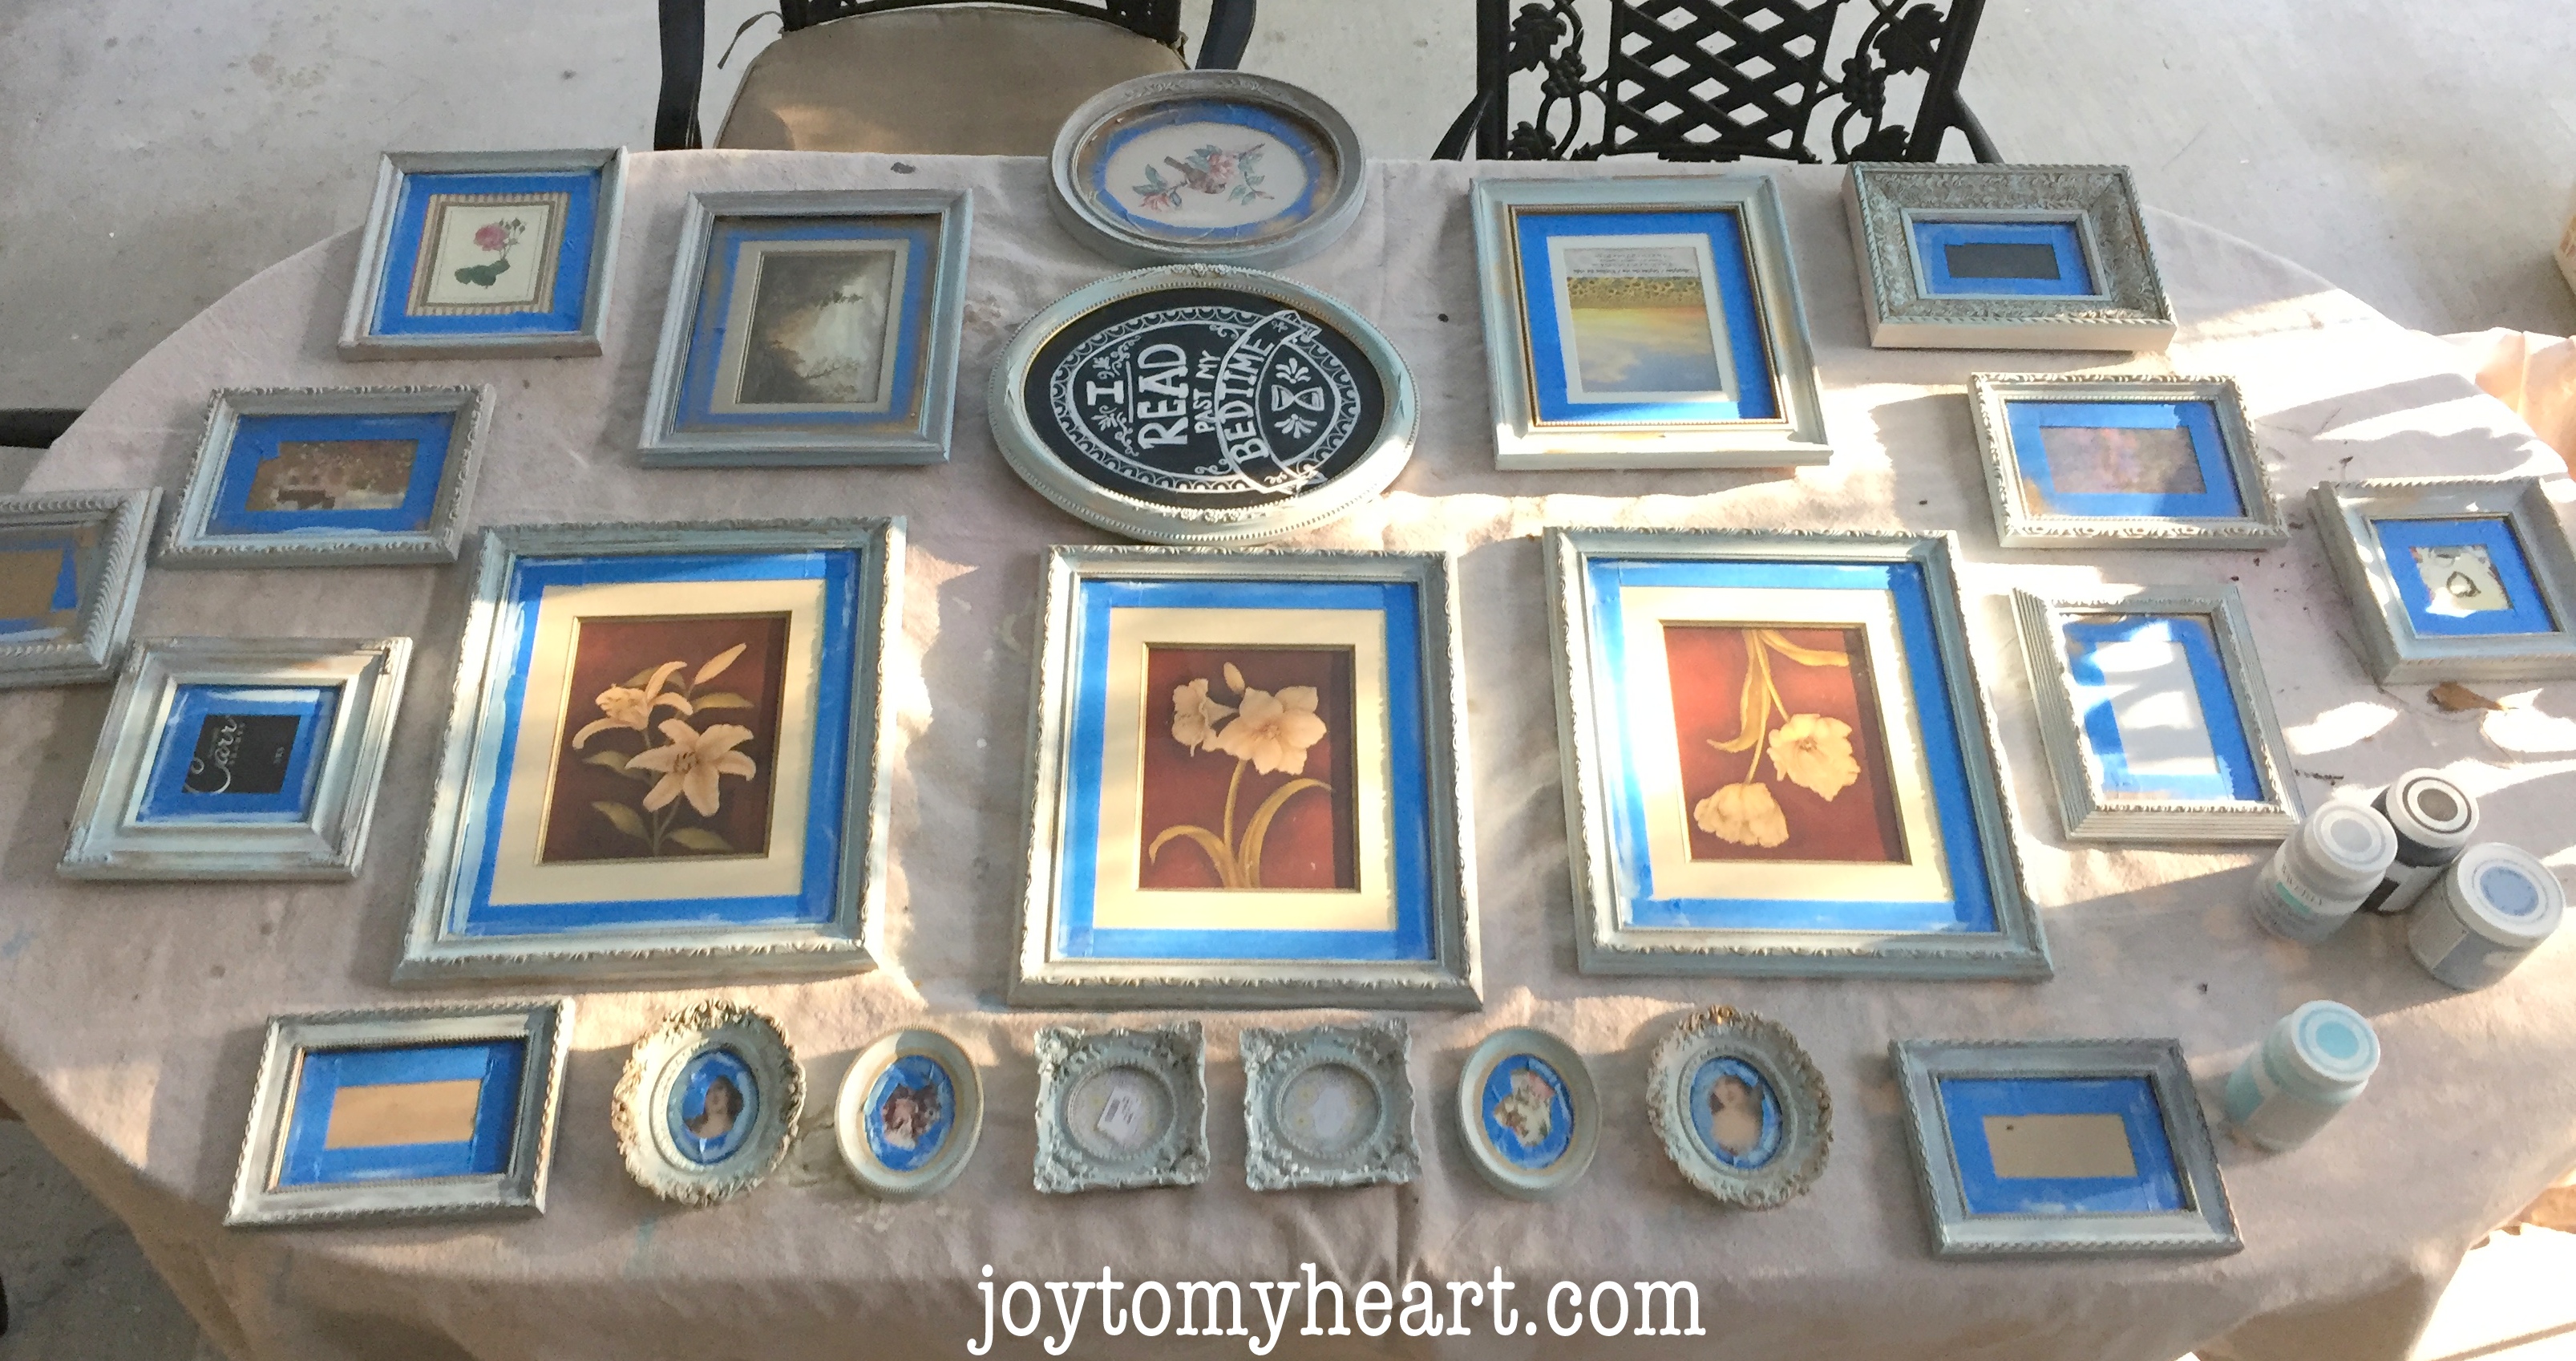
Run painter’s tape along the edge before you paint…js

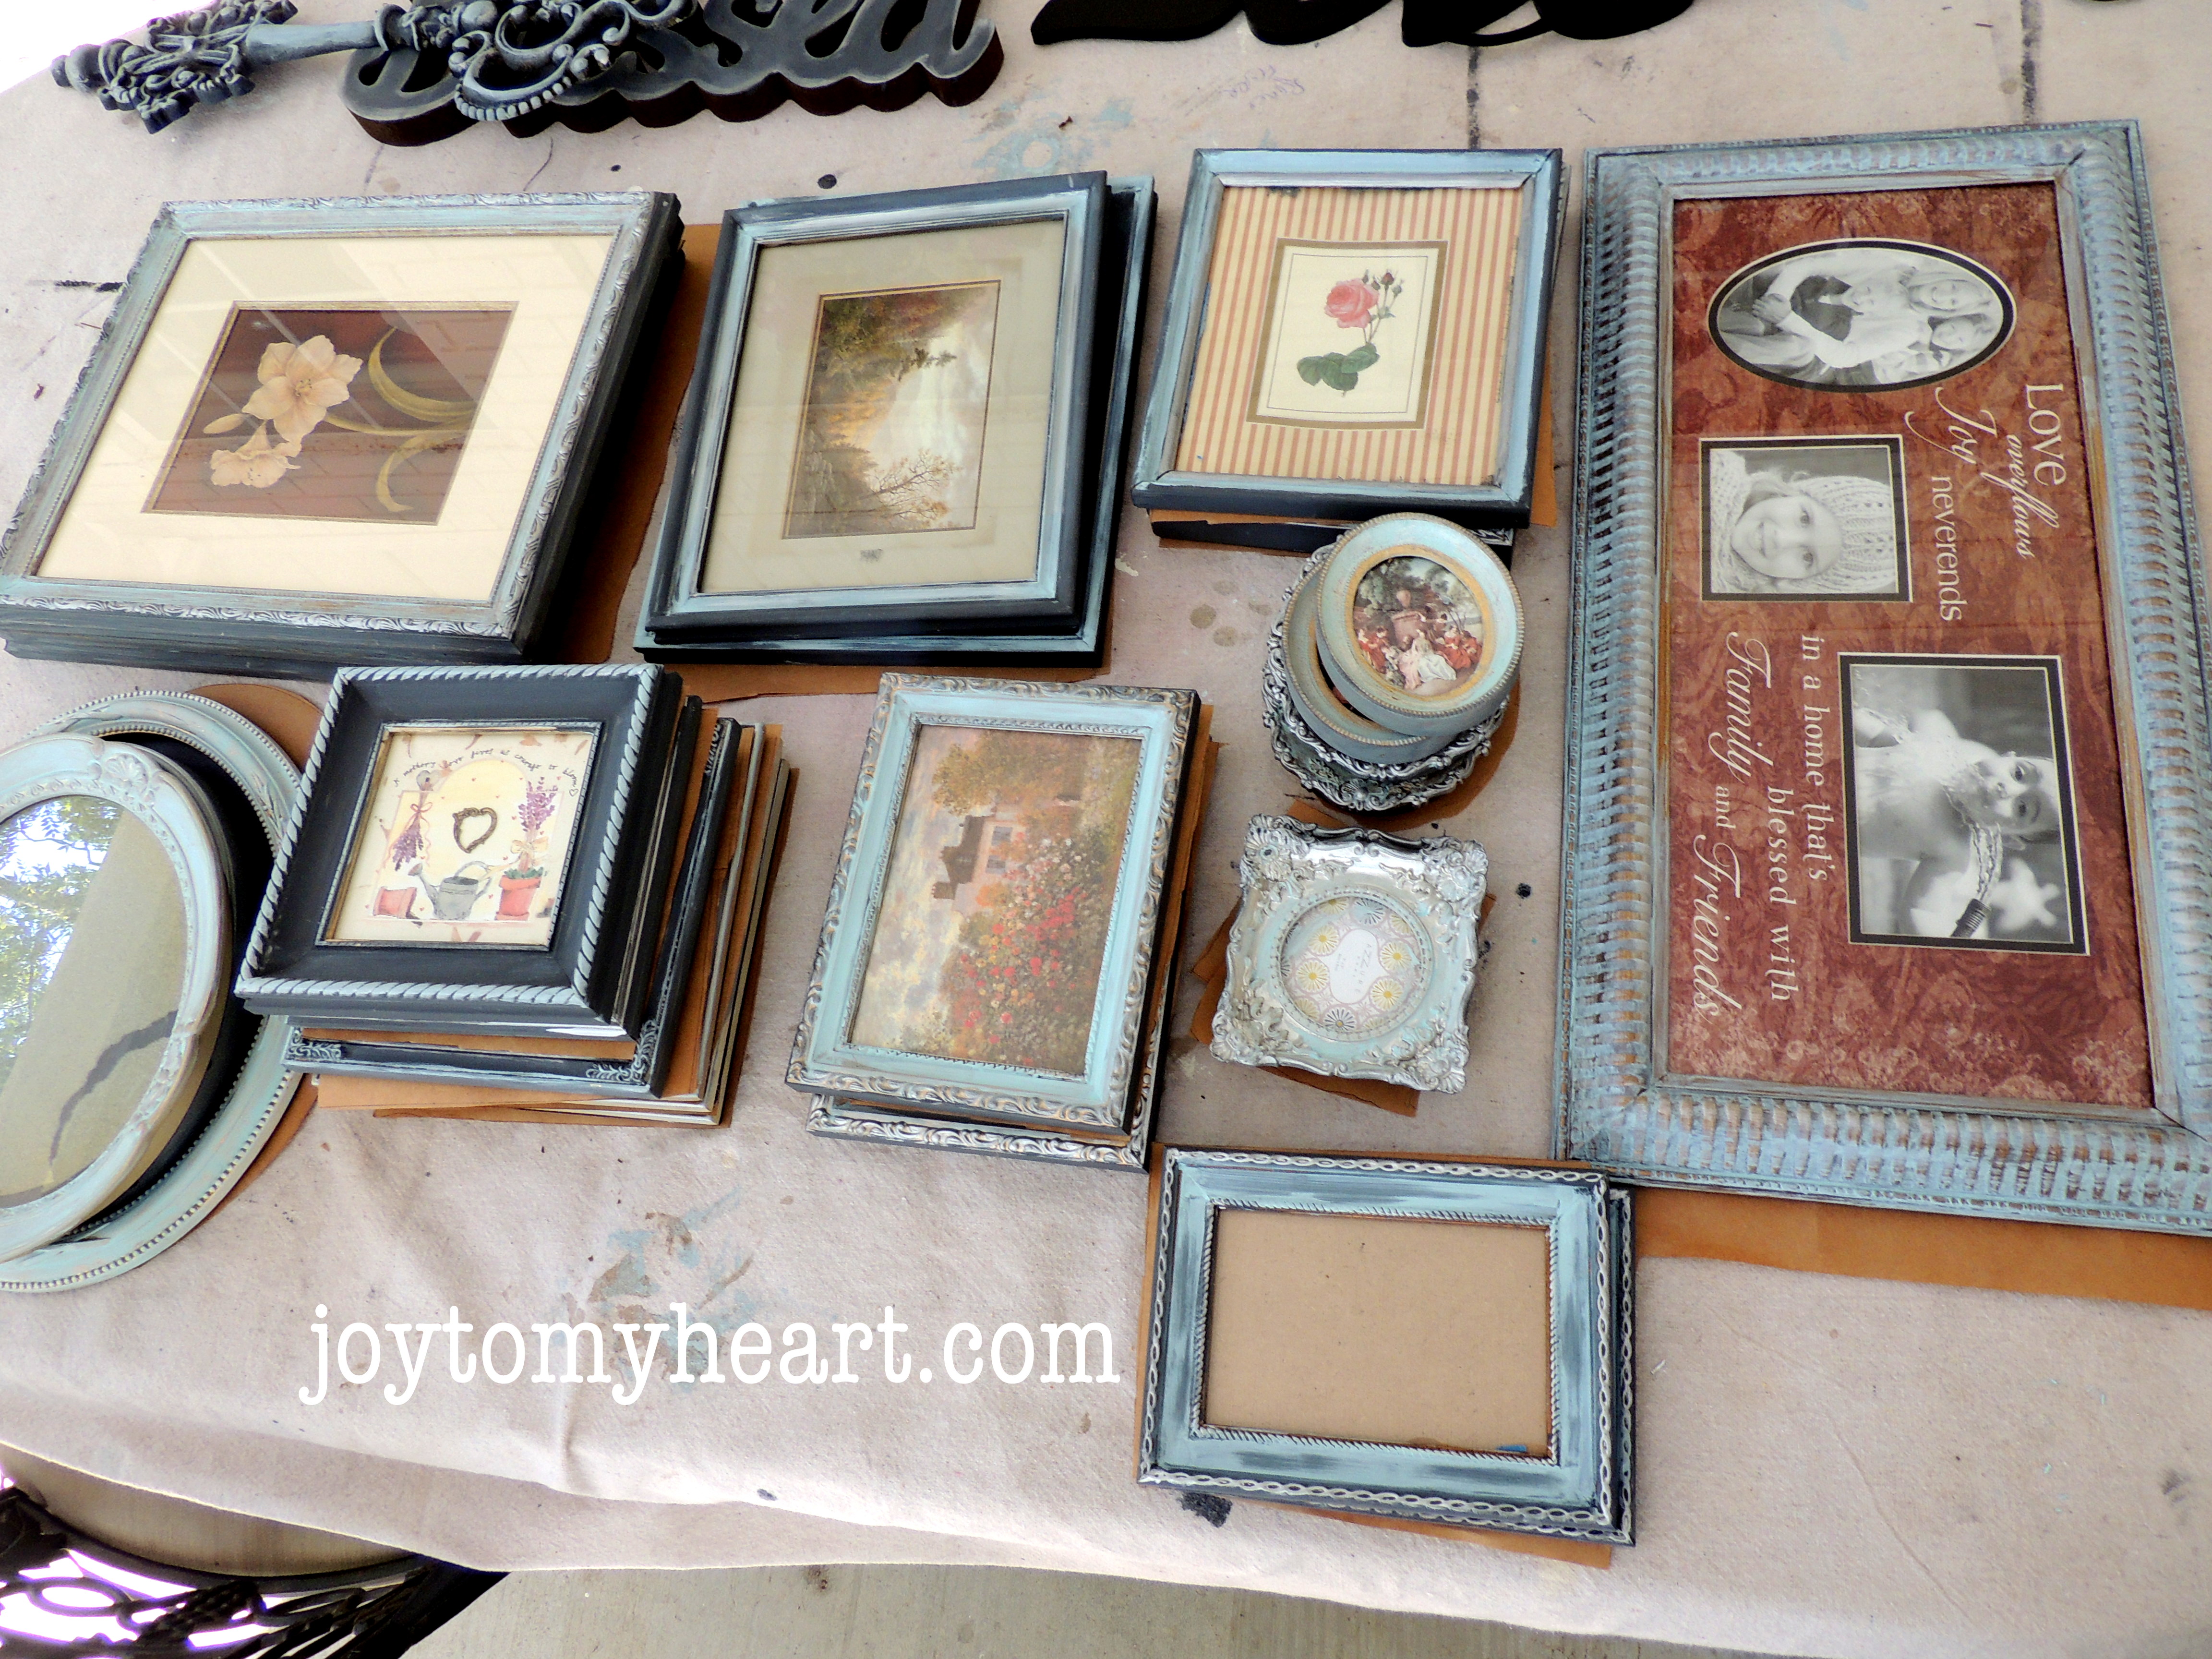
We wanted a old frenchy looking gallery of aqua-blues with silver and maybe a little gold peeking through.
I painted the frames a pale aqua chalk paint, and sanded them so that they looked old, with some of the gold showing. They were beautiful.

After I painted them, I took several to my daughter’s house and checked to see how they looked in her hallway. What I found was that they were the same color value as her dove gray walls. They wouldn’t have the impact that we were wanting.
So sad..:(
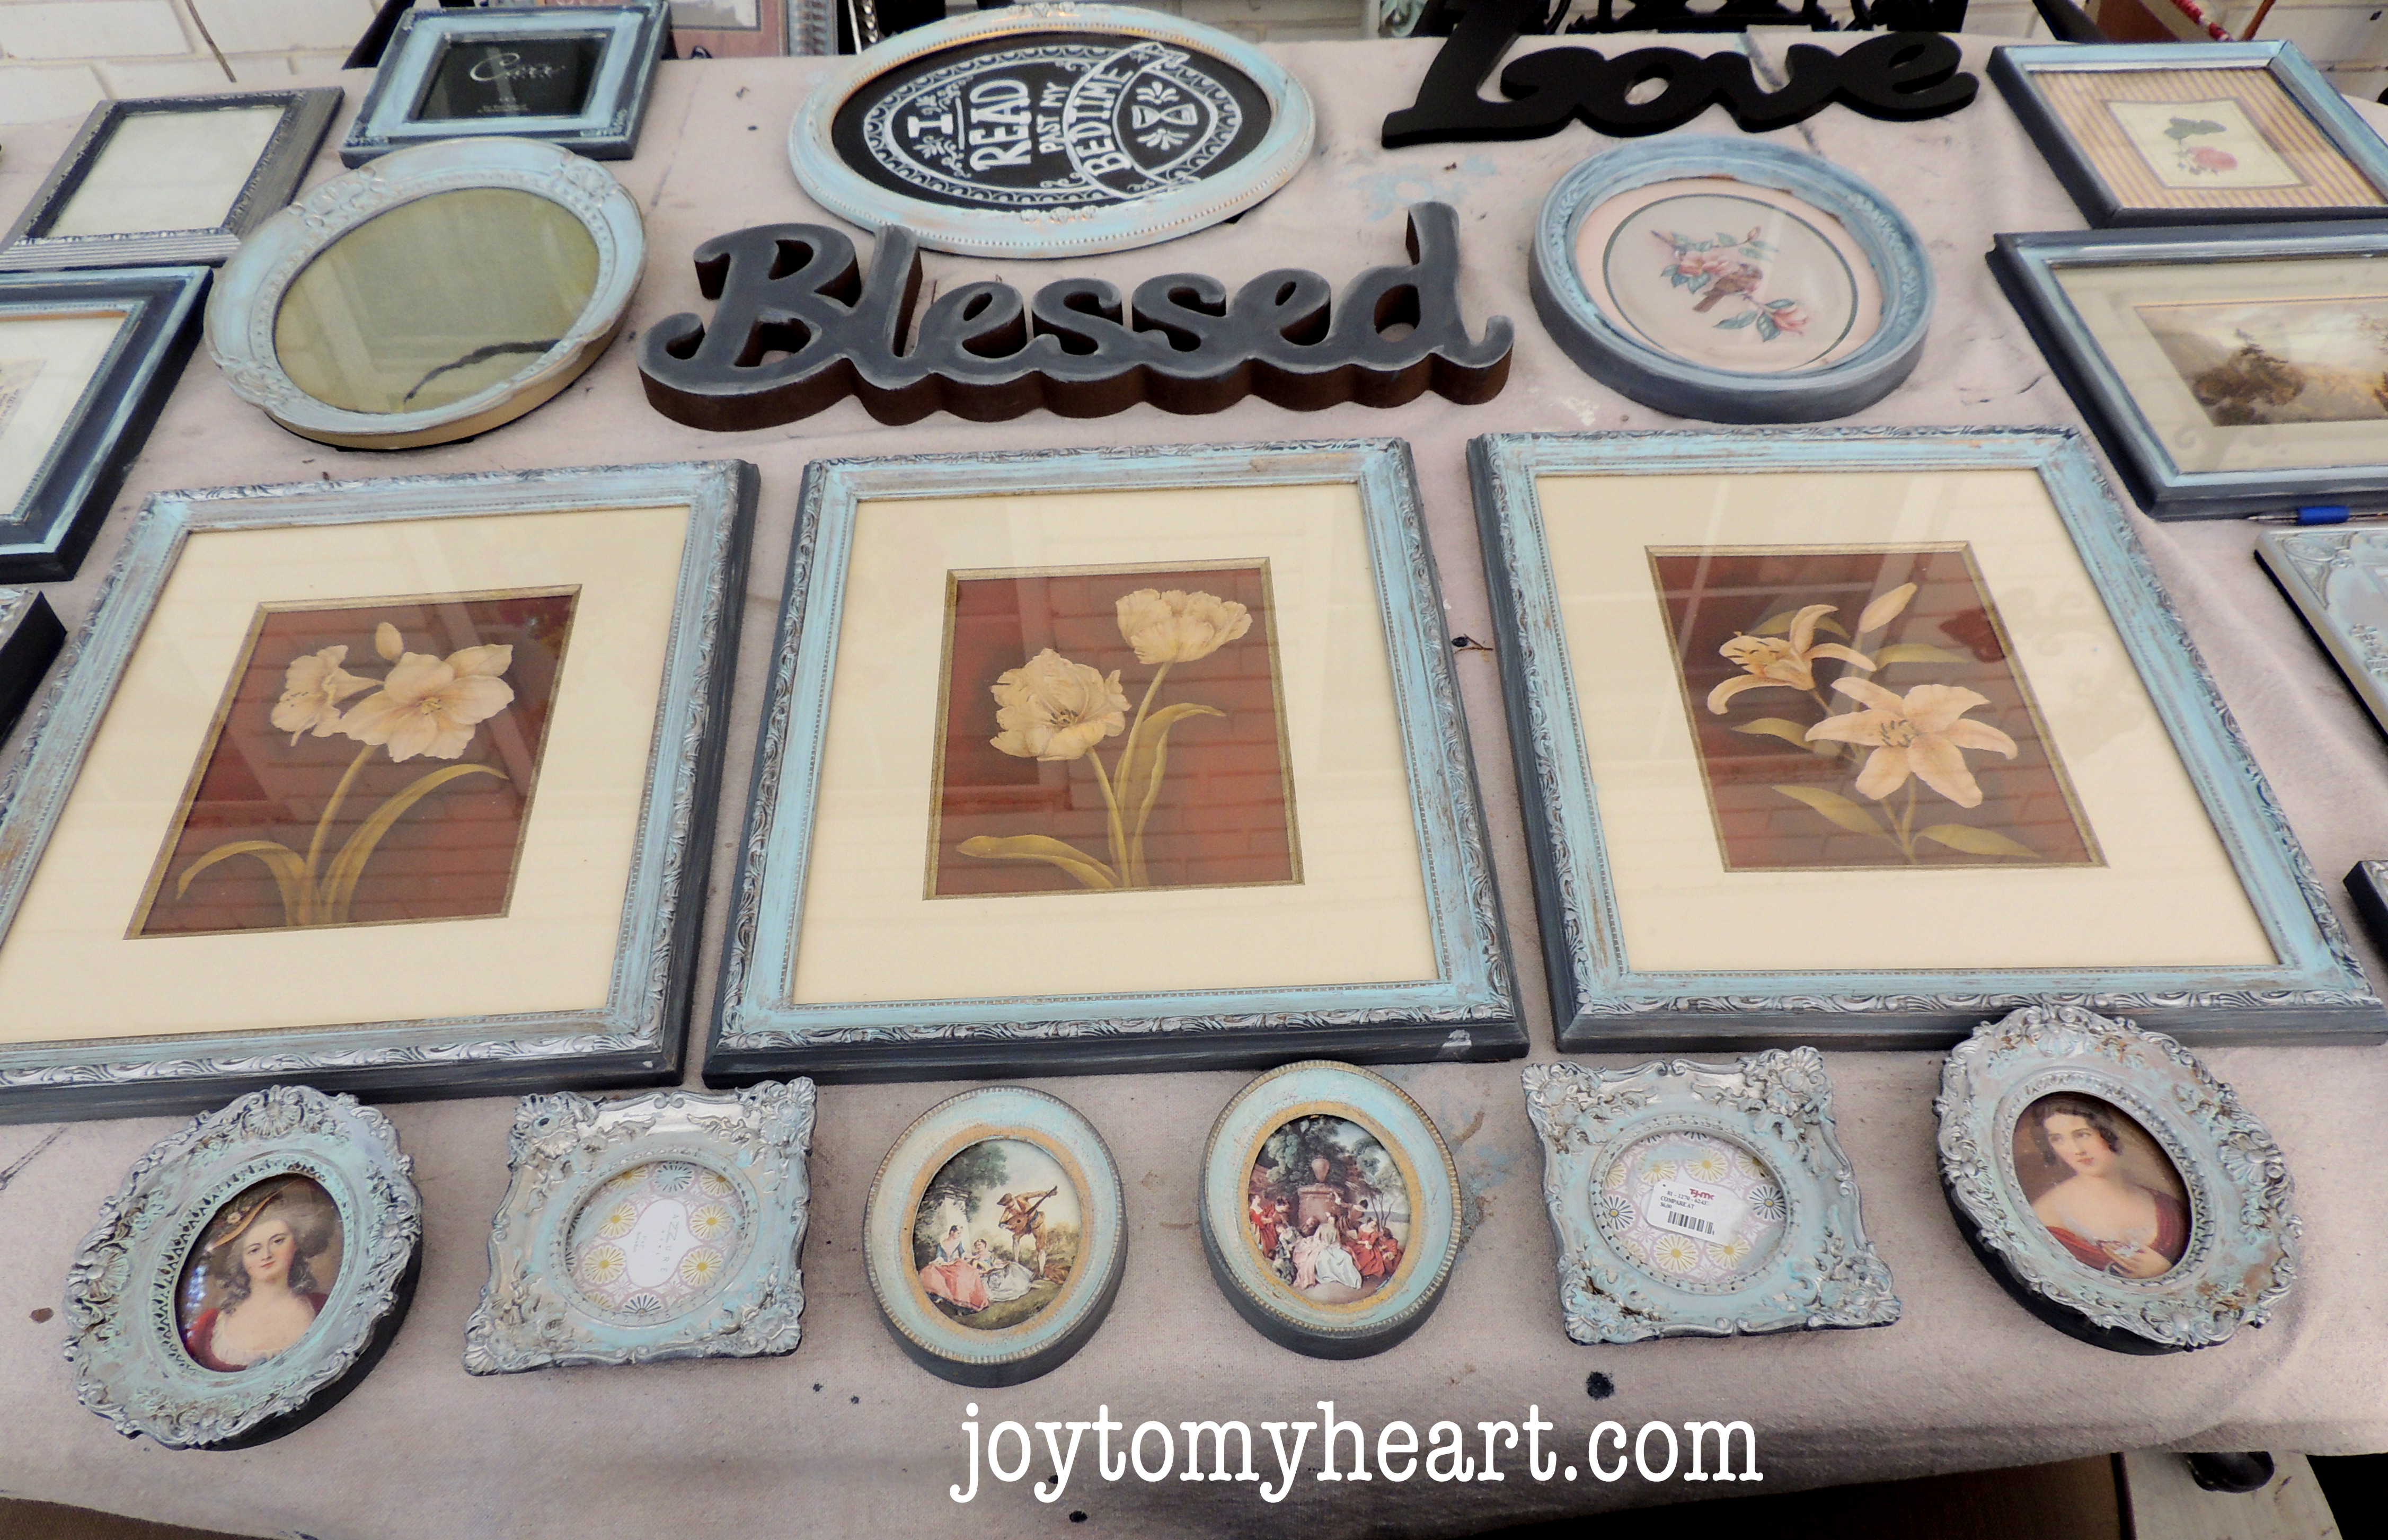
I took them back home and added dark gray to the edges so they would pop off the walls. It worked! I left the blue and added some silver to the details with dark gray on the sides. That solved the problem.
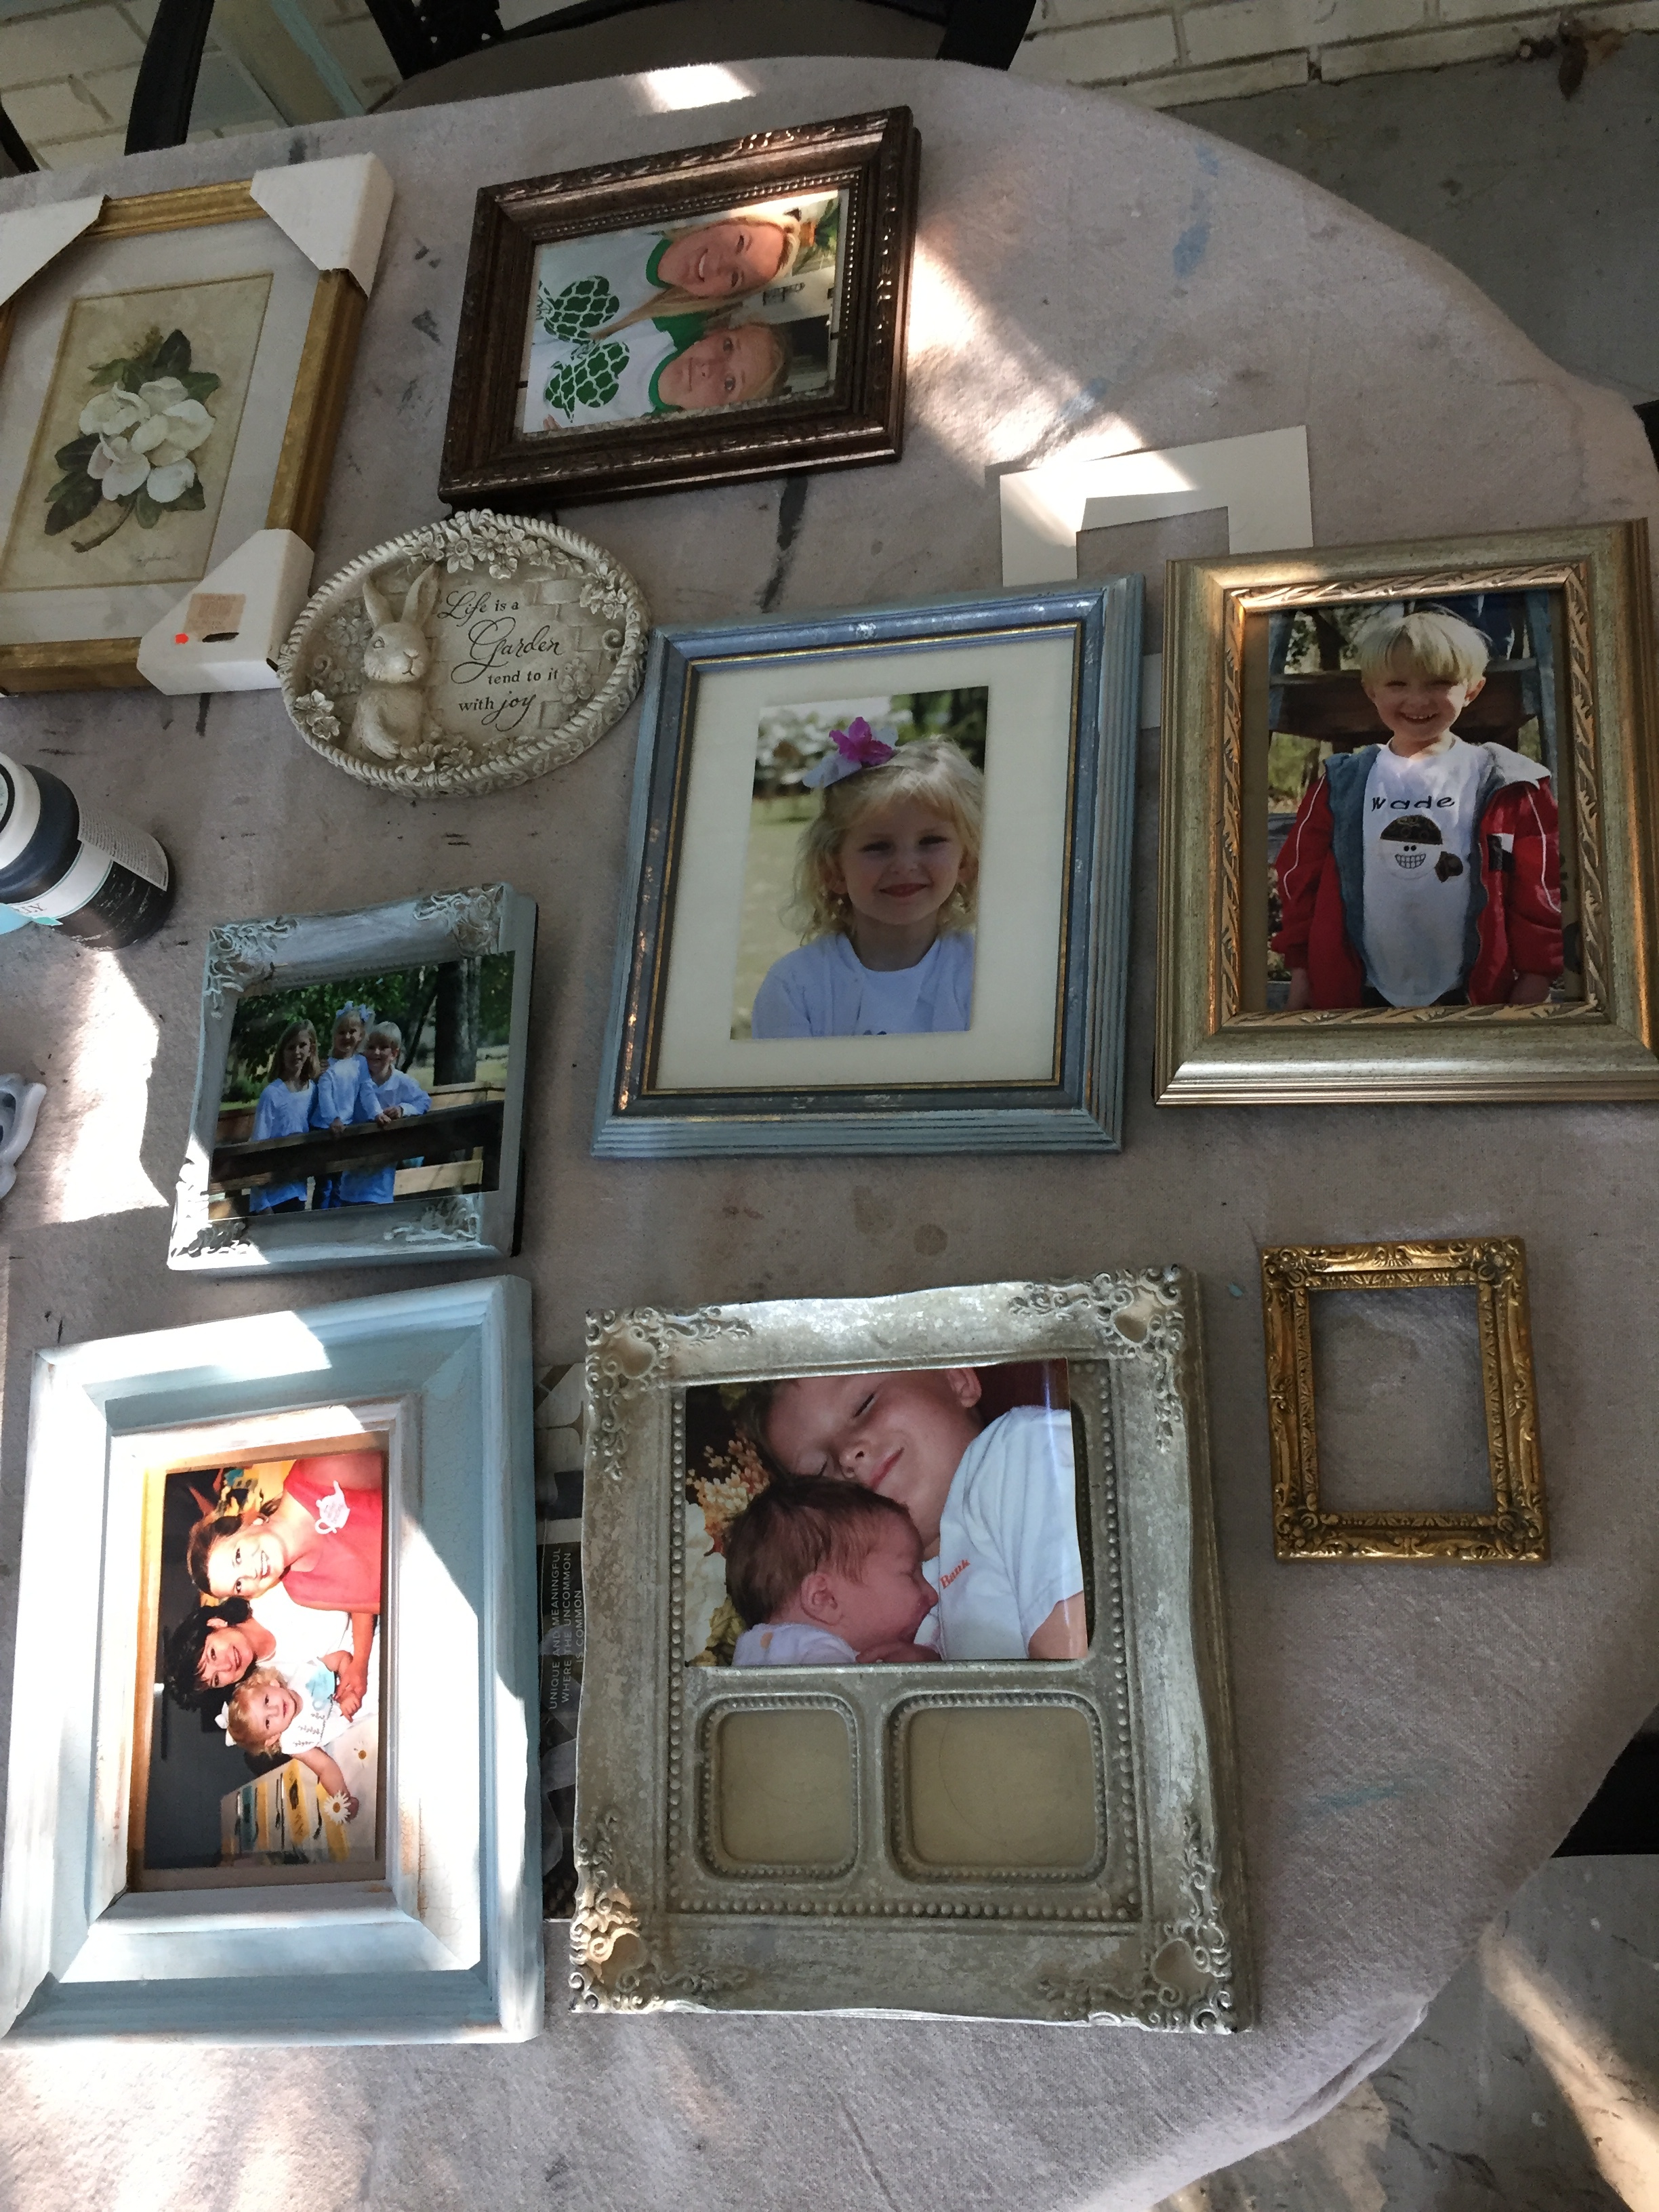
Layout Design on Table or Floor
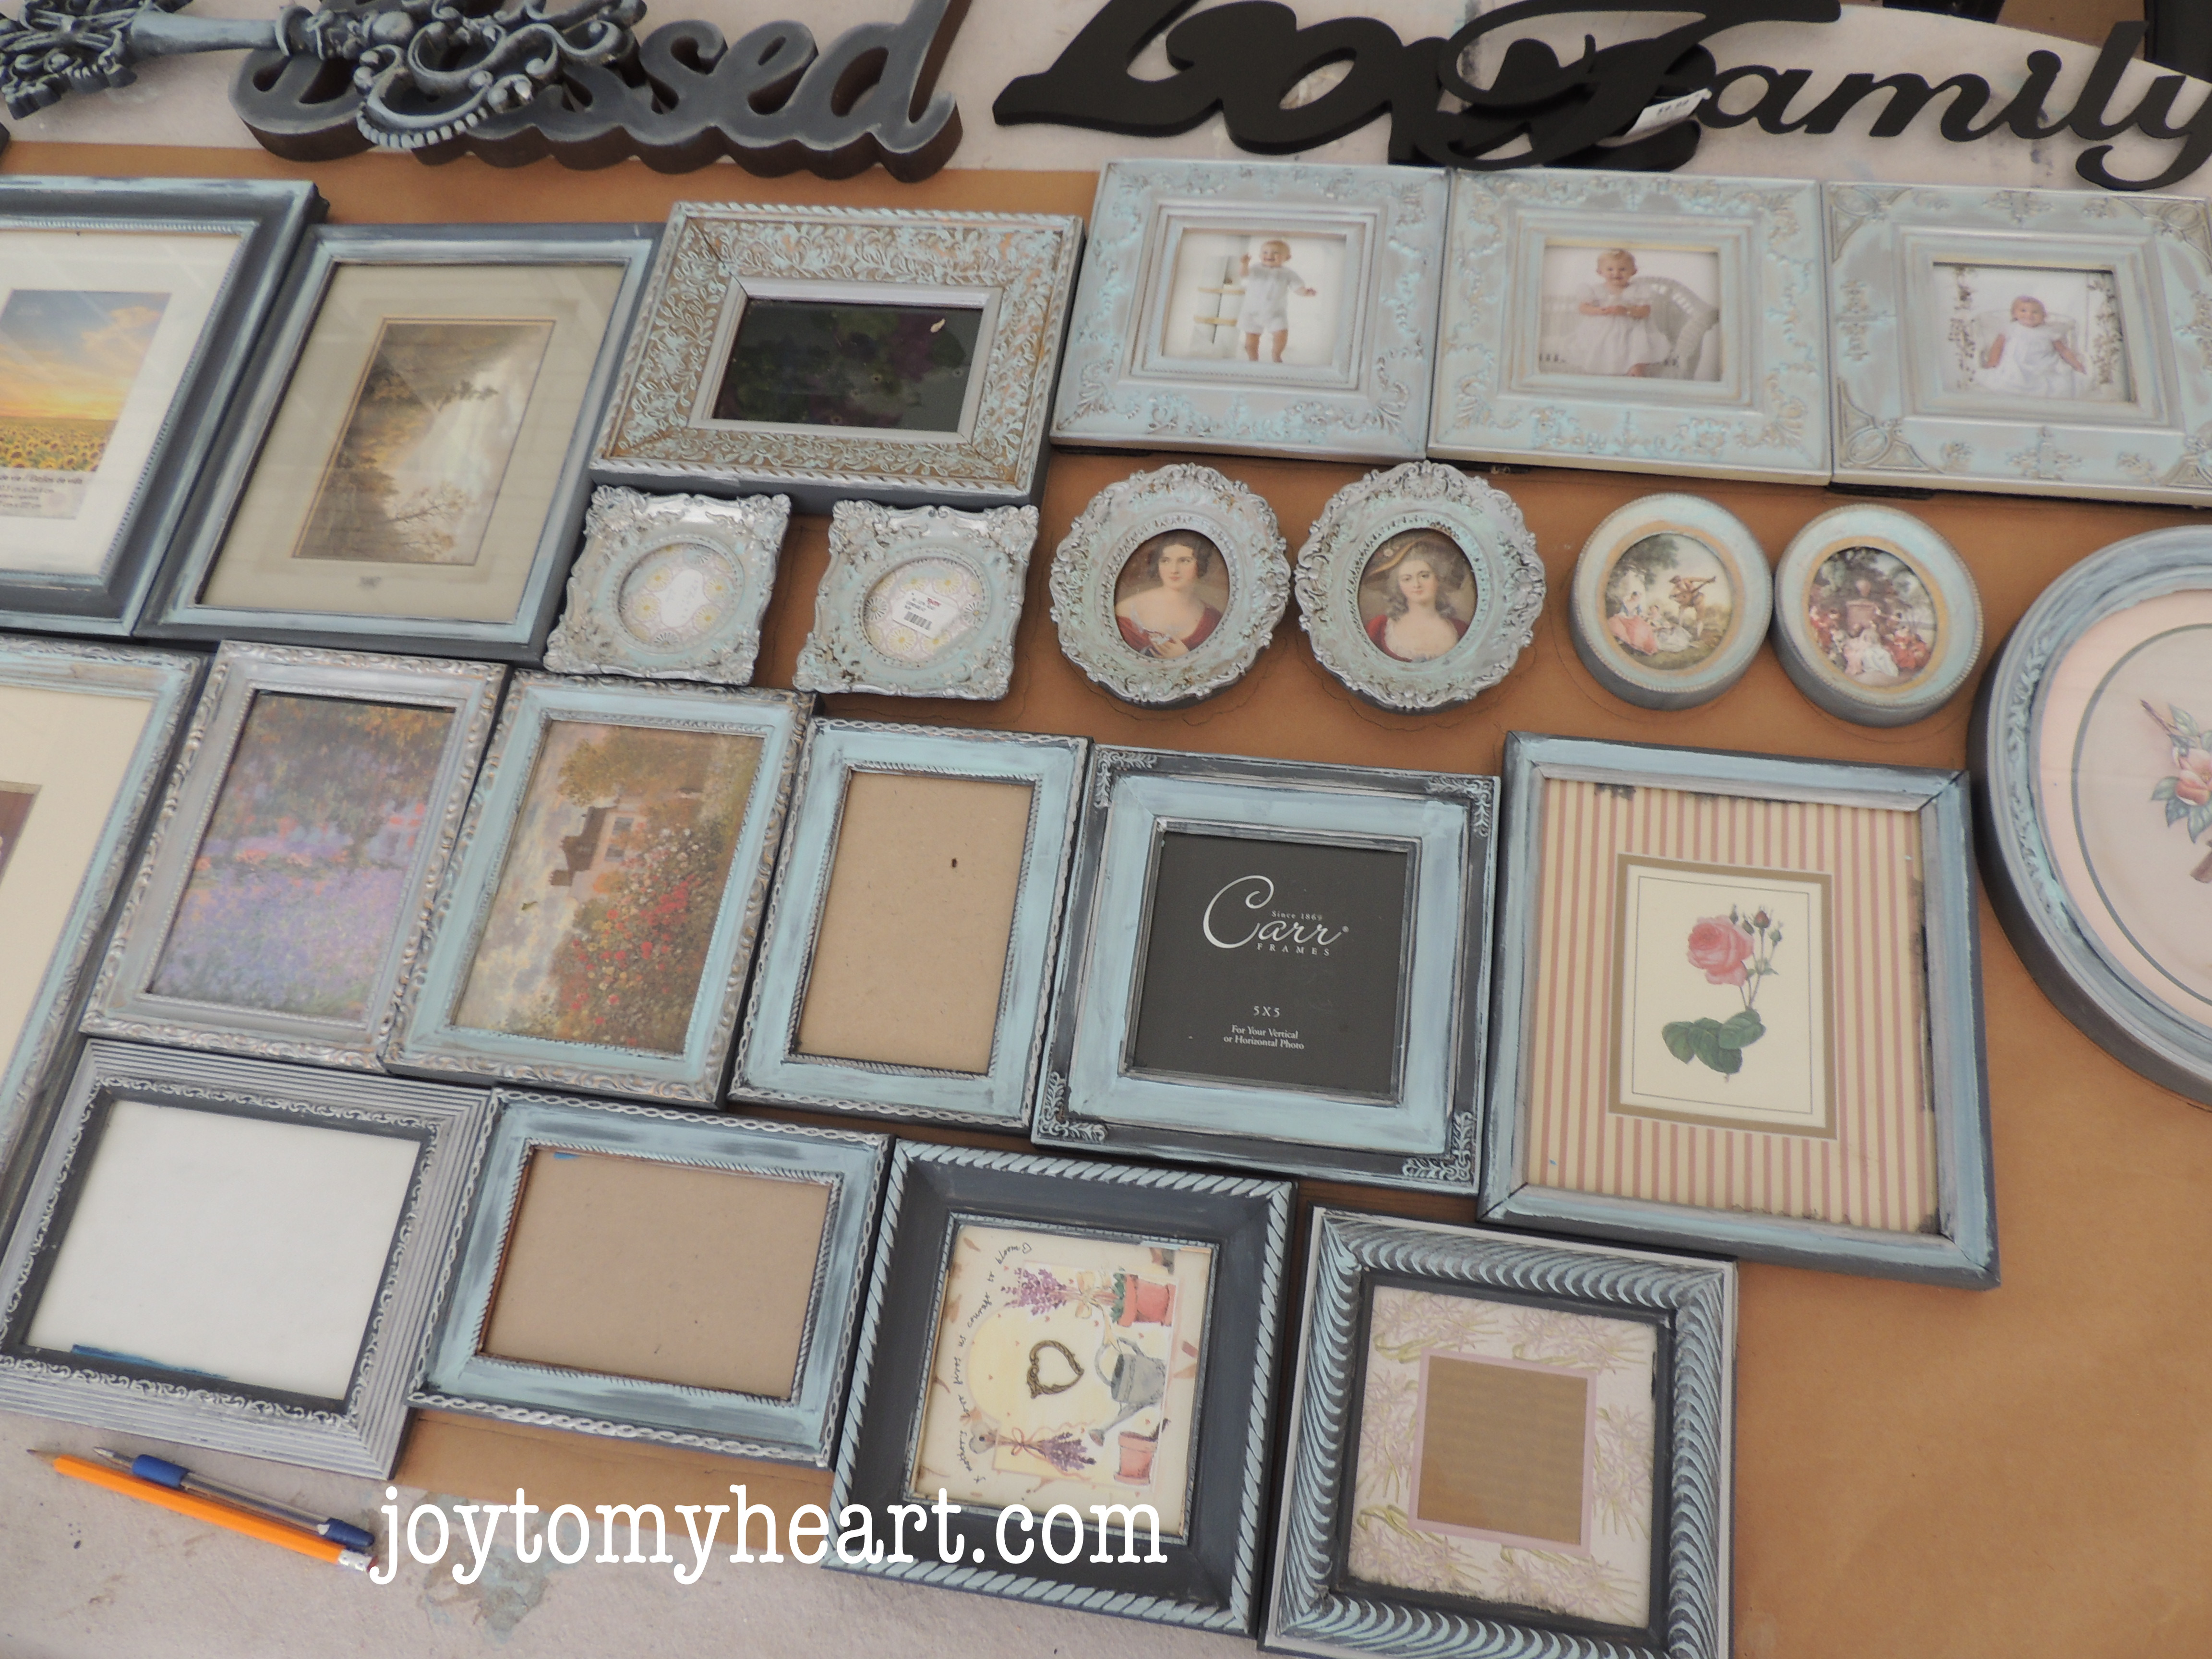
I find it easier to go ahead and work on your layout for the gallery, on the floor or a tabletop, prior to working on the wall.
Begin by placing your largest frames wherever you’d like them and work from there.
I LOVE my tiny little frames.
I decided that my three large frames would be the focal point of the gallery, so I placed them in the center and worked out from there, balancing the size frames on each side, mainly because my daughter likes things balanced. (I know that having things off balance would drive her nuts. ha!)
Take a photo with your phone.
Having a photo of my layout made it easier to place frames and/or patterns on the wall. It gave me something to refer to when making placement, because I had already decided what arrangement looked best. I took this photo with me to her house.
This was the beginning of our gallery.
Make Pattern of Frame Sizes
Making a pattern of each frame is a great help in arranging the frames on your wall. Lay frames out on brown paper. You may use brown paper bags or butcher paper. Place them, touching each other and draw a pattern of each one.
Once the patterns are cut out, use the paper cut-outs to arrange your “frames” on the wall with painters tape….

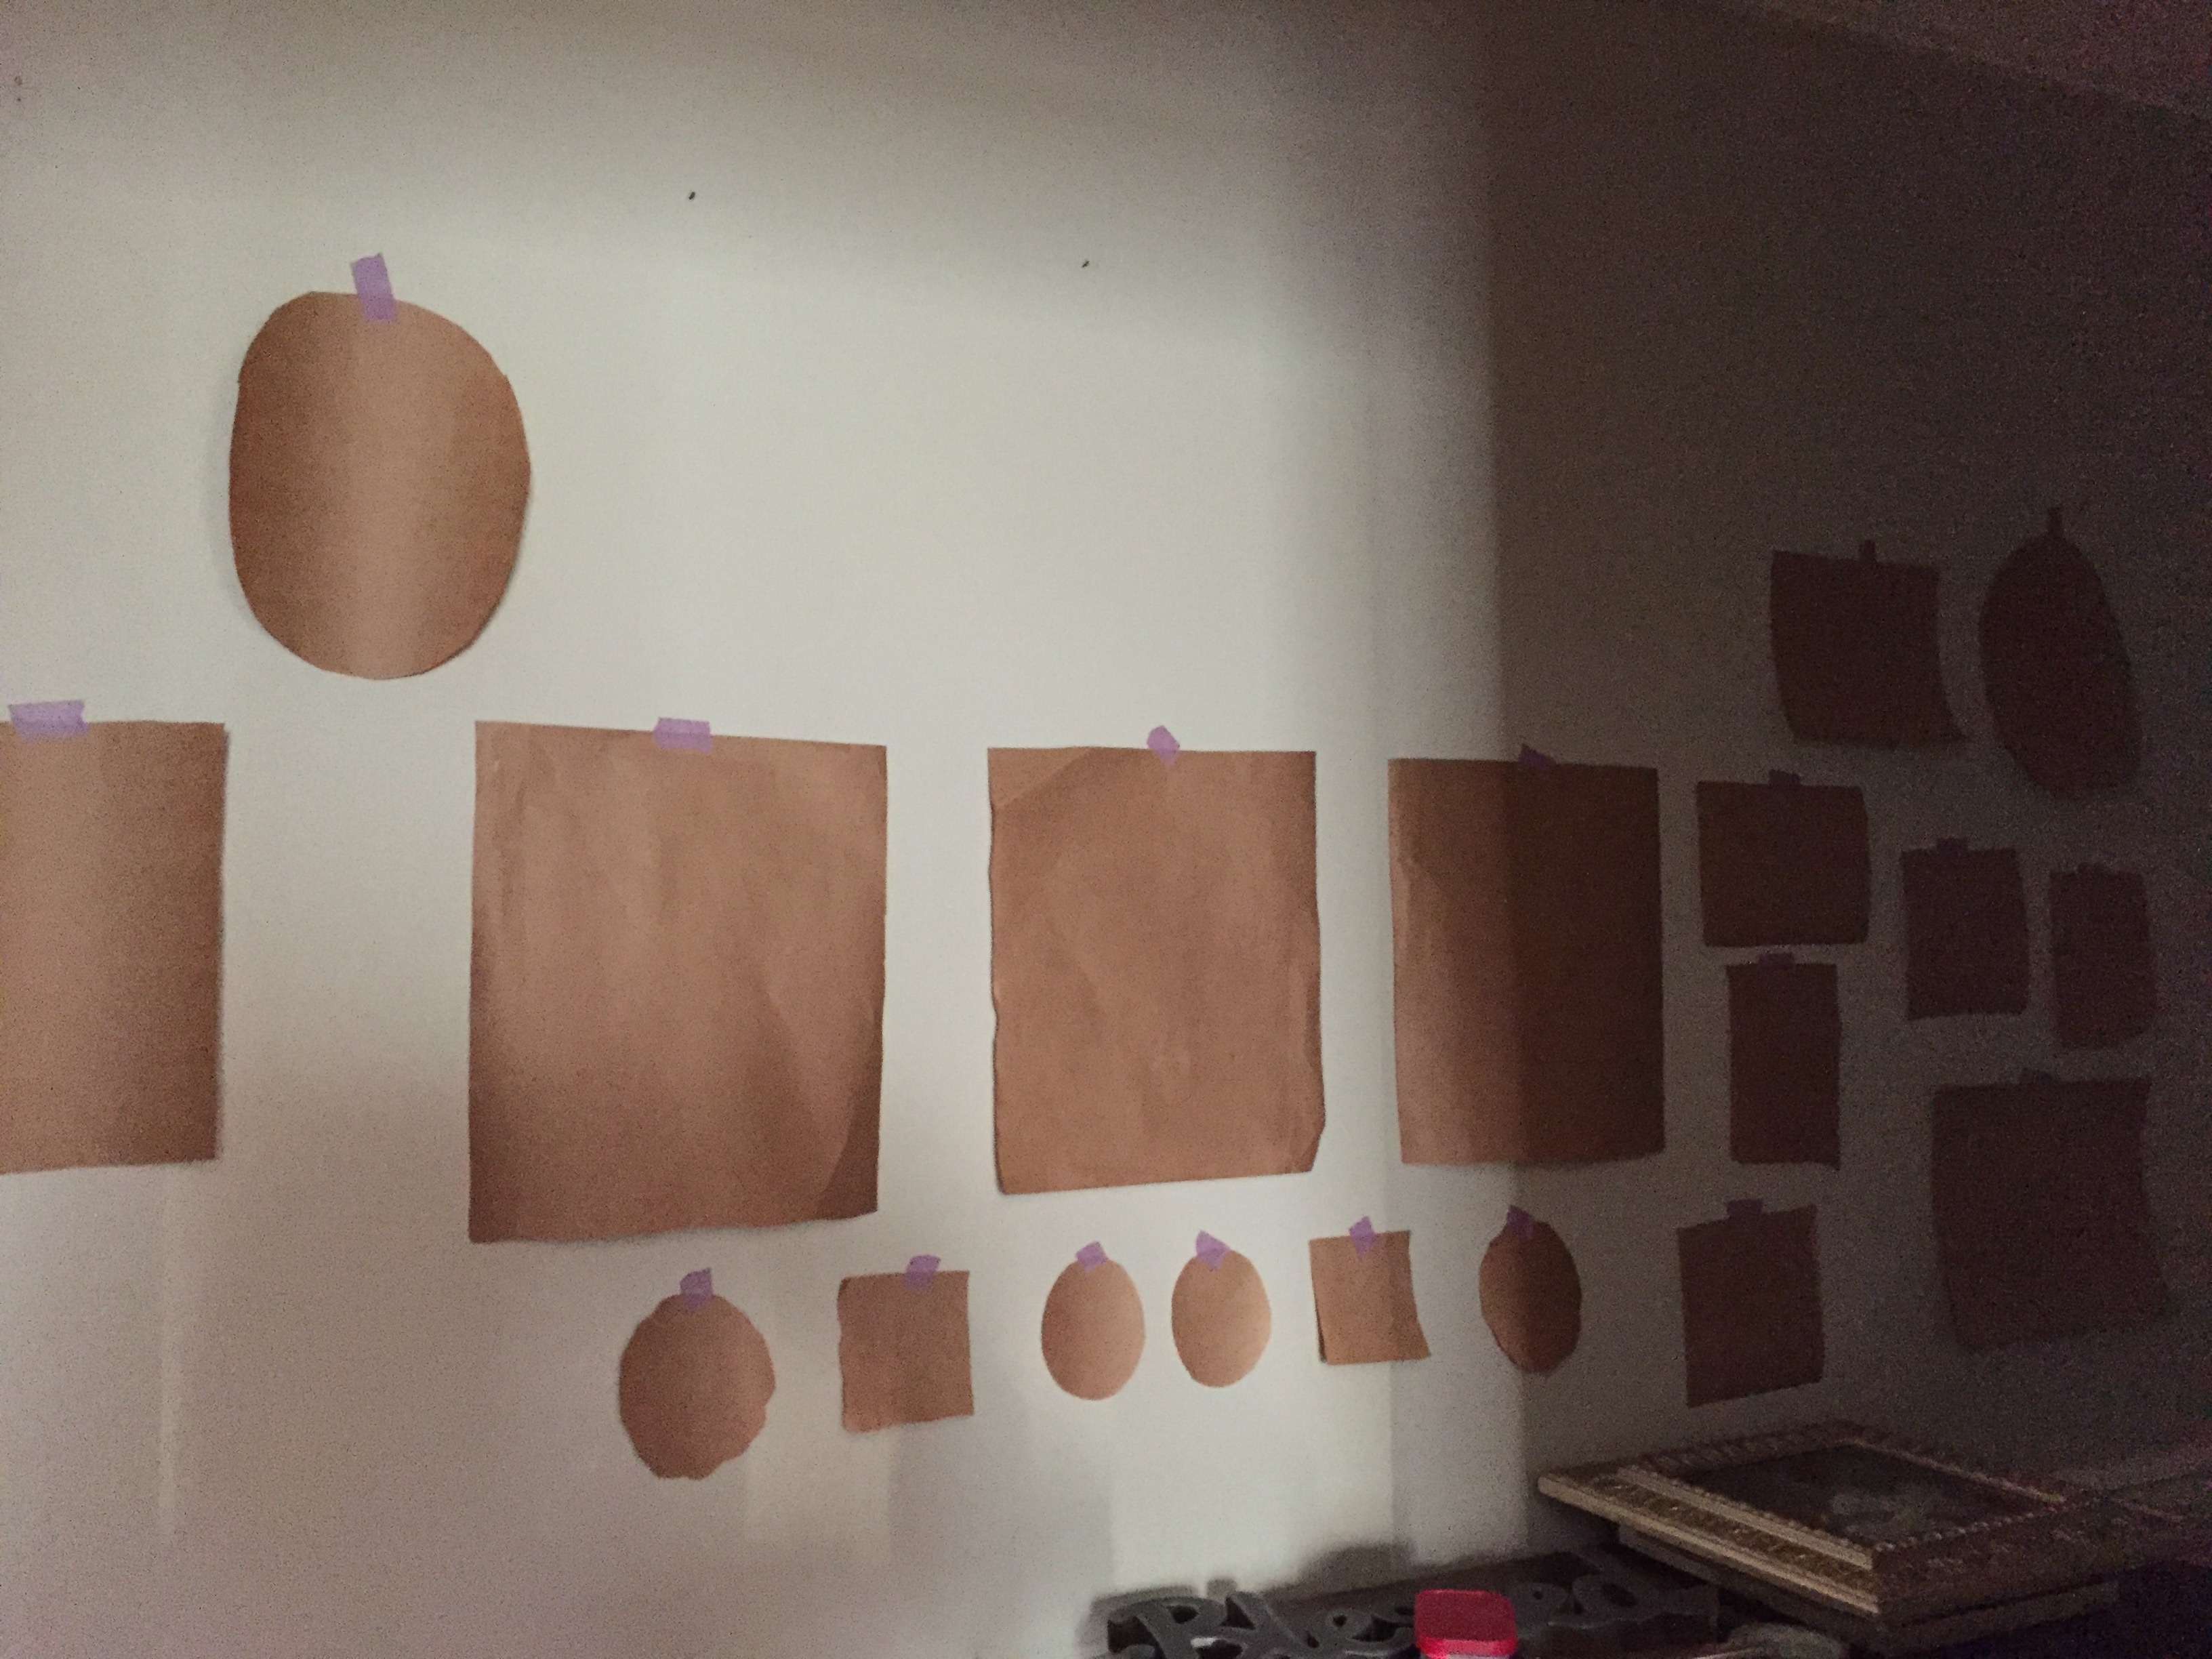
….so you won’t have to put holes all over the wall while deciding what goes where. This also makes it easier to make adjustments to your original design.
Counting Frames by Size
Next I made a list of how many frames I have in each size.
I had 4 5×5 and 3 8×10…etc.
With this info, I was able to decide which photos I needed, in which size. You may choose to use color photos or black and white photos or sepia or a combination!
Choosing Photos
Once you have your frames painted and the layout decided, it’s time for photos. There are several criteria I used to decide the pictures for our gallery. You will have your own criteria, but this will give you an idea of my project.
1. Have basically an equal number of photos of each child.
2. Photos from each stage of their lives: baby, toddler, early childhood, middle school, high school.
3. Family group photos
4. Photos of kids with each other.
5. Extended family photos. (if I don’t run out of frames:)
Most of the photos I have are on my computer, so I made a folder with my favorite photos of each child.
Since I wanted this done yesterday, I uploaded photos to Walmart’s one hour photo lab and chose the sizes I needed. Easy Peasy. I ordered my photos, put them into the frames and I was ready to go.
Tip on Positioning Frames
***Any photo with small subjects needs to be close to or below eye level.
You may have a small frame with a large subject a little higher because the subject can still be seen. But group photos with lots of small faces need to be at eye level to be enjoyed.
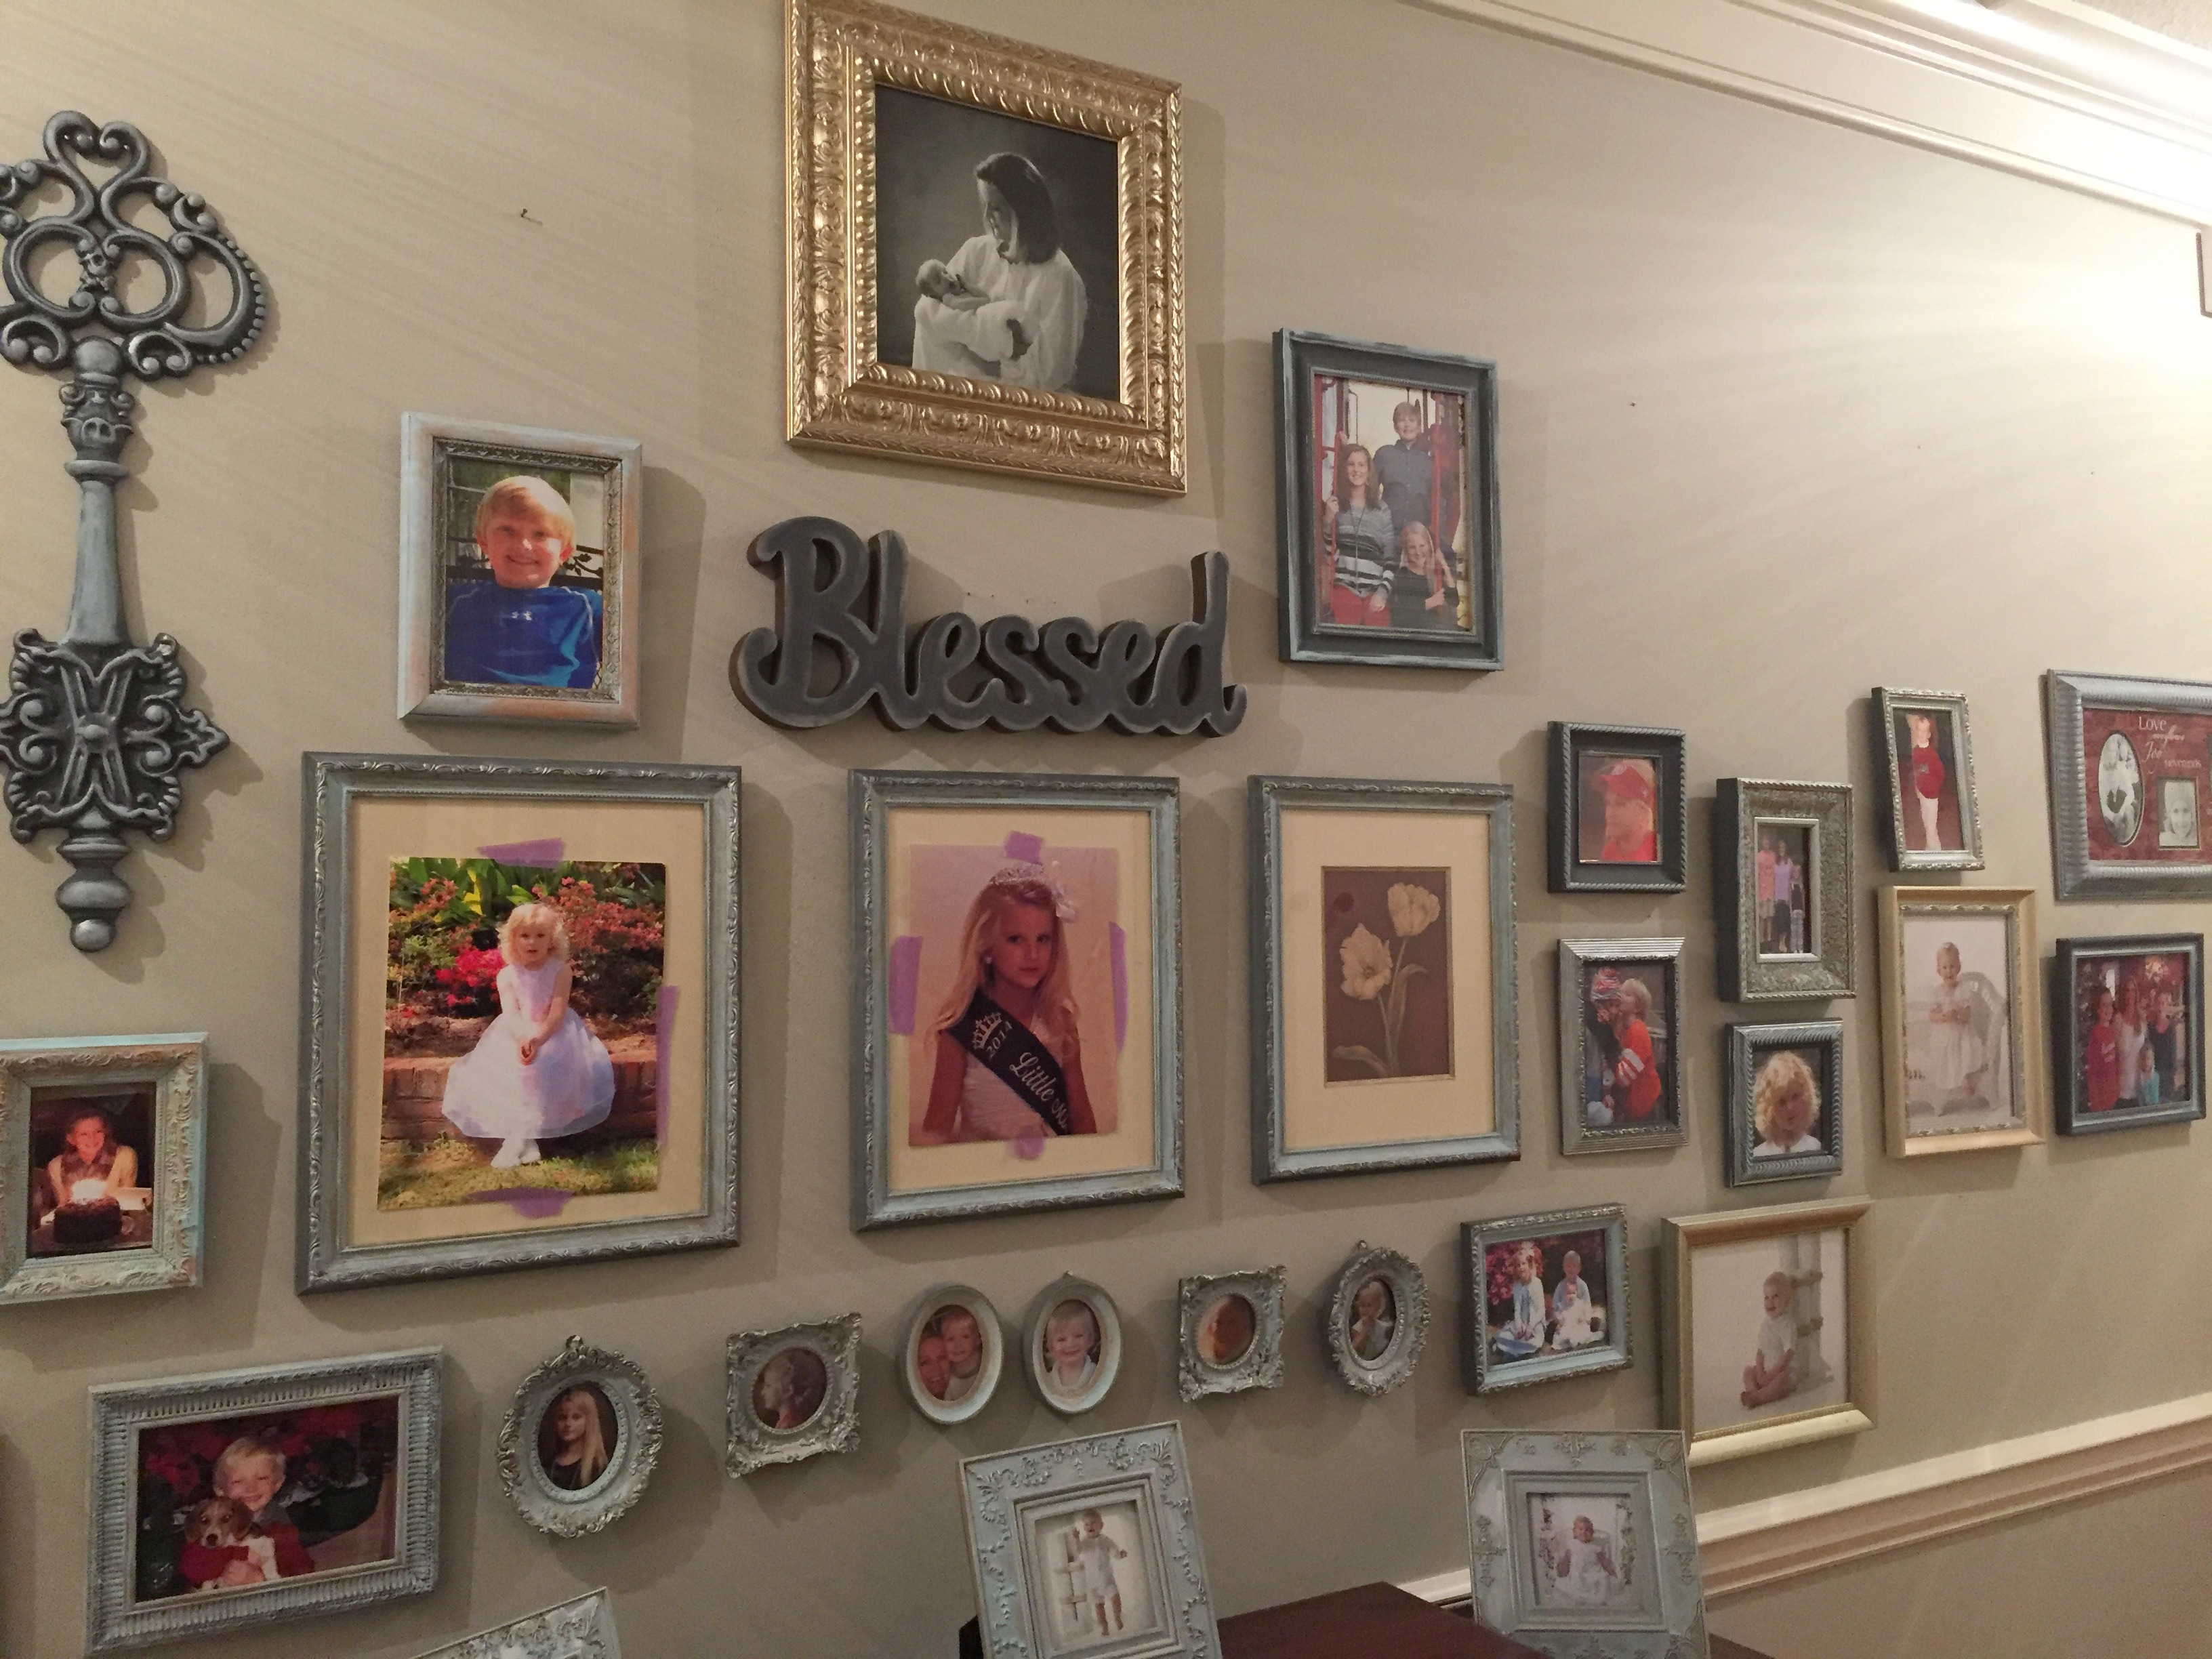
Adding Interesting Objects
Lastly, to make the photo gallery more interesting, we added some words that describe the gallery. We chose, “Family”, “Blessed” and “Love.” I found these at Hobby Lobby for half price. Another thing I found at Goodwill was a large metal key.
Adding Letters
Use initials, empty frames and any other object of interest to personalize your gallery.
The great thing about a photo gallery is you can change it all along. You may add more, take away some…add seasonal pictures to decorate, like Christmas photos from years past. It can be as large or as small as you like.
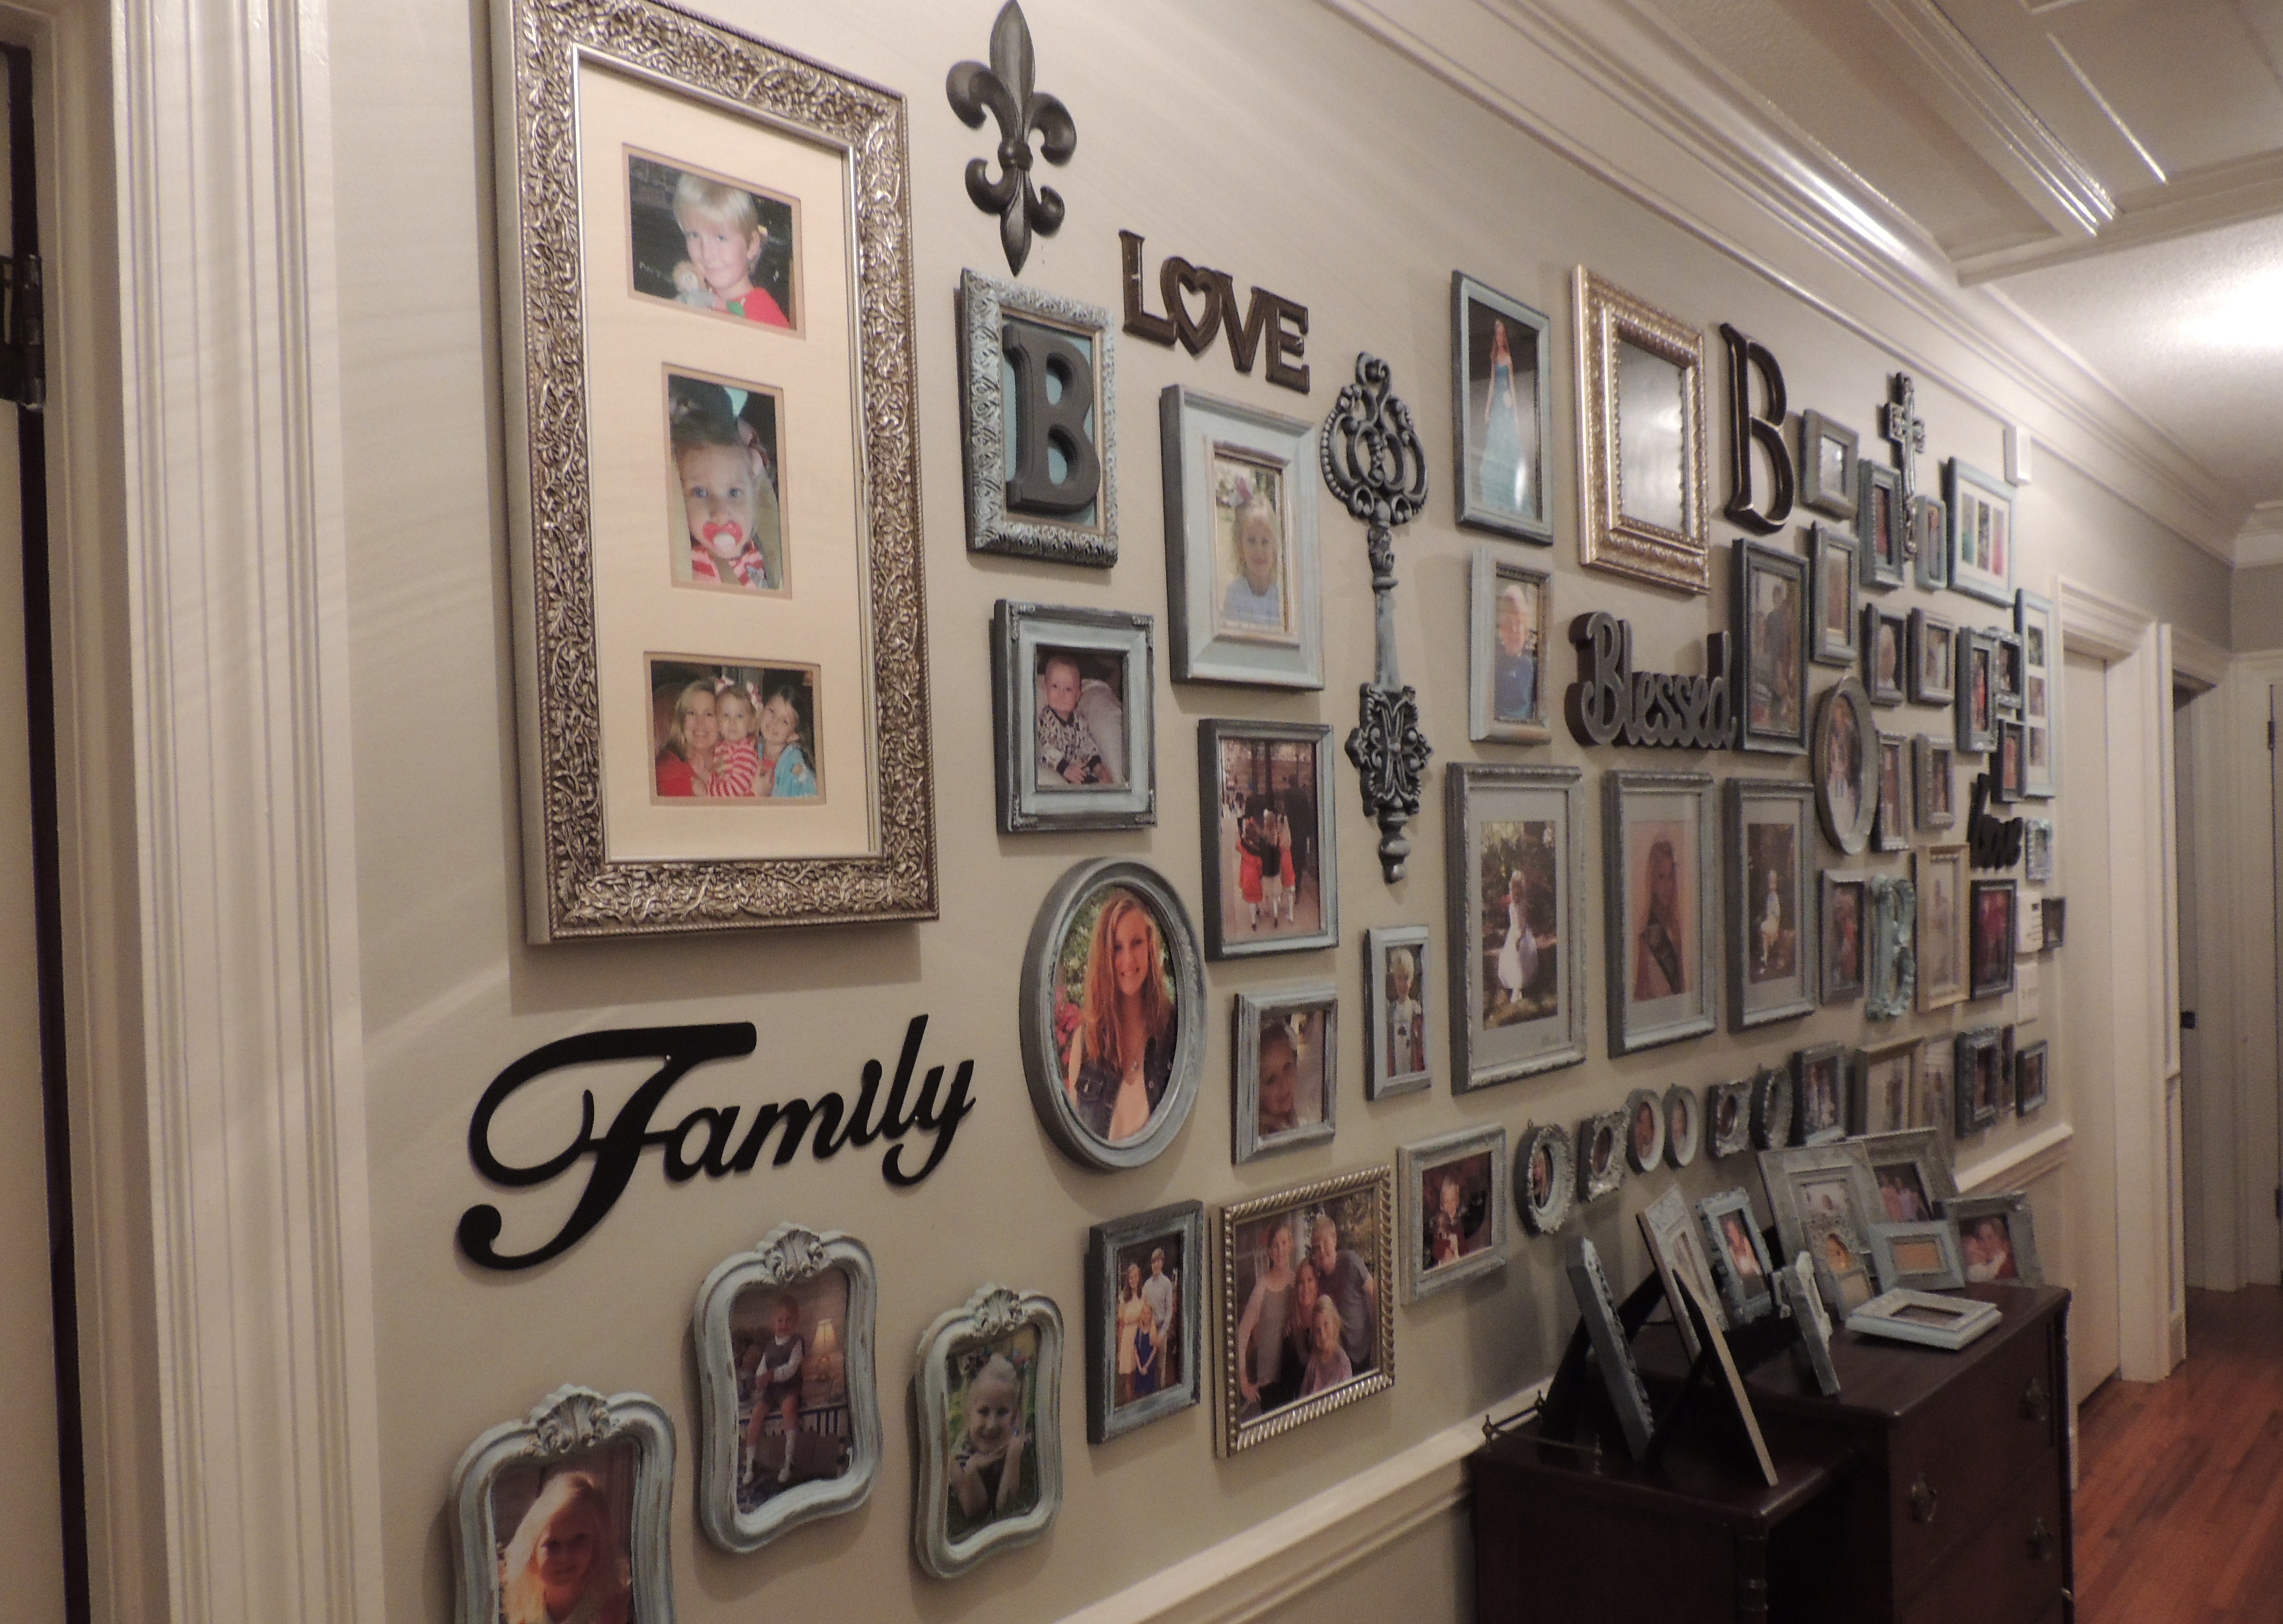
I couldn’t stop…..once I got started, I had so many cute photos…(I told you) and every time I stopped by a thrift store there would be another frame calling my name….I had to fill the wall completely…..we will worry about where to place the 8 year old’s middle school and high school pictures later… 🙂

We are all so happy with the way it turned out. So what are you waiting for? Make a folder of your best and cutest photos, start thrift shopping for frames and decide what color is best for you…
A Designer Photo Gallery on a Budget can be yours in no time at all!

6 Comments
What wonderful ideas! The wall looks amazing.
November 29, 2016 at 7:35 pmThank you so much, Lisa!
November 29, 2016 at 8:52 pmThanks, Lisa!
December 16, 2016 at 8:21 pmI love your photo gallery indeed,excellent job here!
December 18, 2016 at 5:06 amThank you, Elmer!
December 27, 2016 at 10:29 pmcan i take my vape on the plane 2019
January 17, 2021 at 9:39 pm