After yesterday’s post Hand Painted Easter Eggs I decided it still may seem daunting to paint your own eggs. So to show you, in detail, how simple it really is, I painted these samples this morning.
Simply begin by painting the whole egg whatever background color you like. Paint two coats, at least, and allow to dry in between coats. Then choose your design. Using the paint colors YOU like and follow these simple instructions! I use regular craft paint you can find at WalMart. And a small set of brushes.
Simply by changing the base coat color and the design color the number of eggs is limitless with just these 6 designs…So enjoy creating your own keepsake eggs. Yes, they will keep forever….unless, like me, you make the mistake of allowing a toddler to hold one…they can’t resist the crush! It is just so cool to crush an egg in your hands…
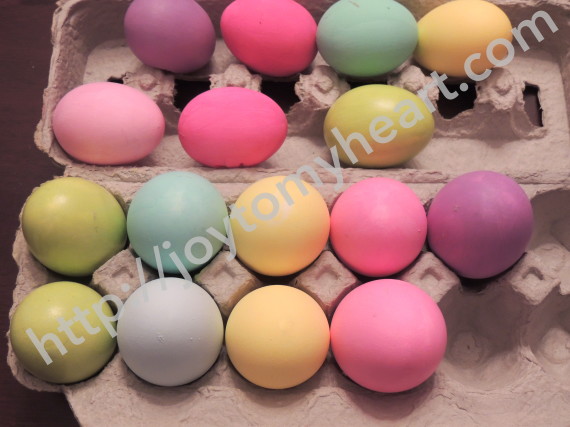
These are my eggs, ready to paint for this year…I chose medium and pastel colors as my base colors. Now I am ready to work on my designs. I think I am going to do more traditional eggs this year.I’ll share my new Hand Painted Easter Eggs when I finish.
These designs are some of my first designs, so I know you can do it!
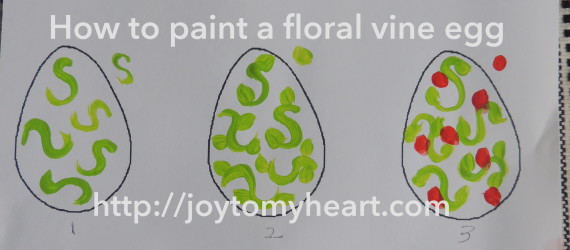
This first design is basically an “S” painted in various directions. Then I added a little blob to the vine, which from hence forth will be known as a leaf, and to the vine a red flower blob. No artistic ability is needed.
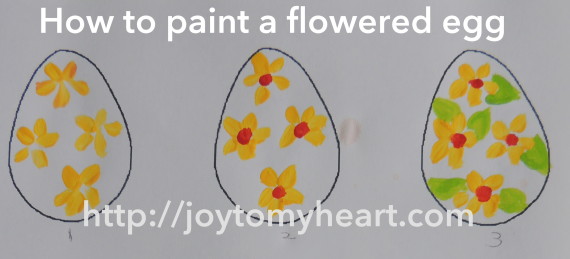
You can see the petals of these very simple flowers, five strokes and then a center. Paint a green triangle shape and you have a leaf. That wasn’t hard.

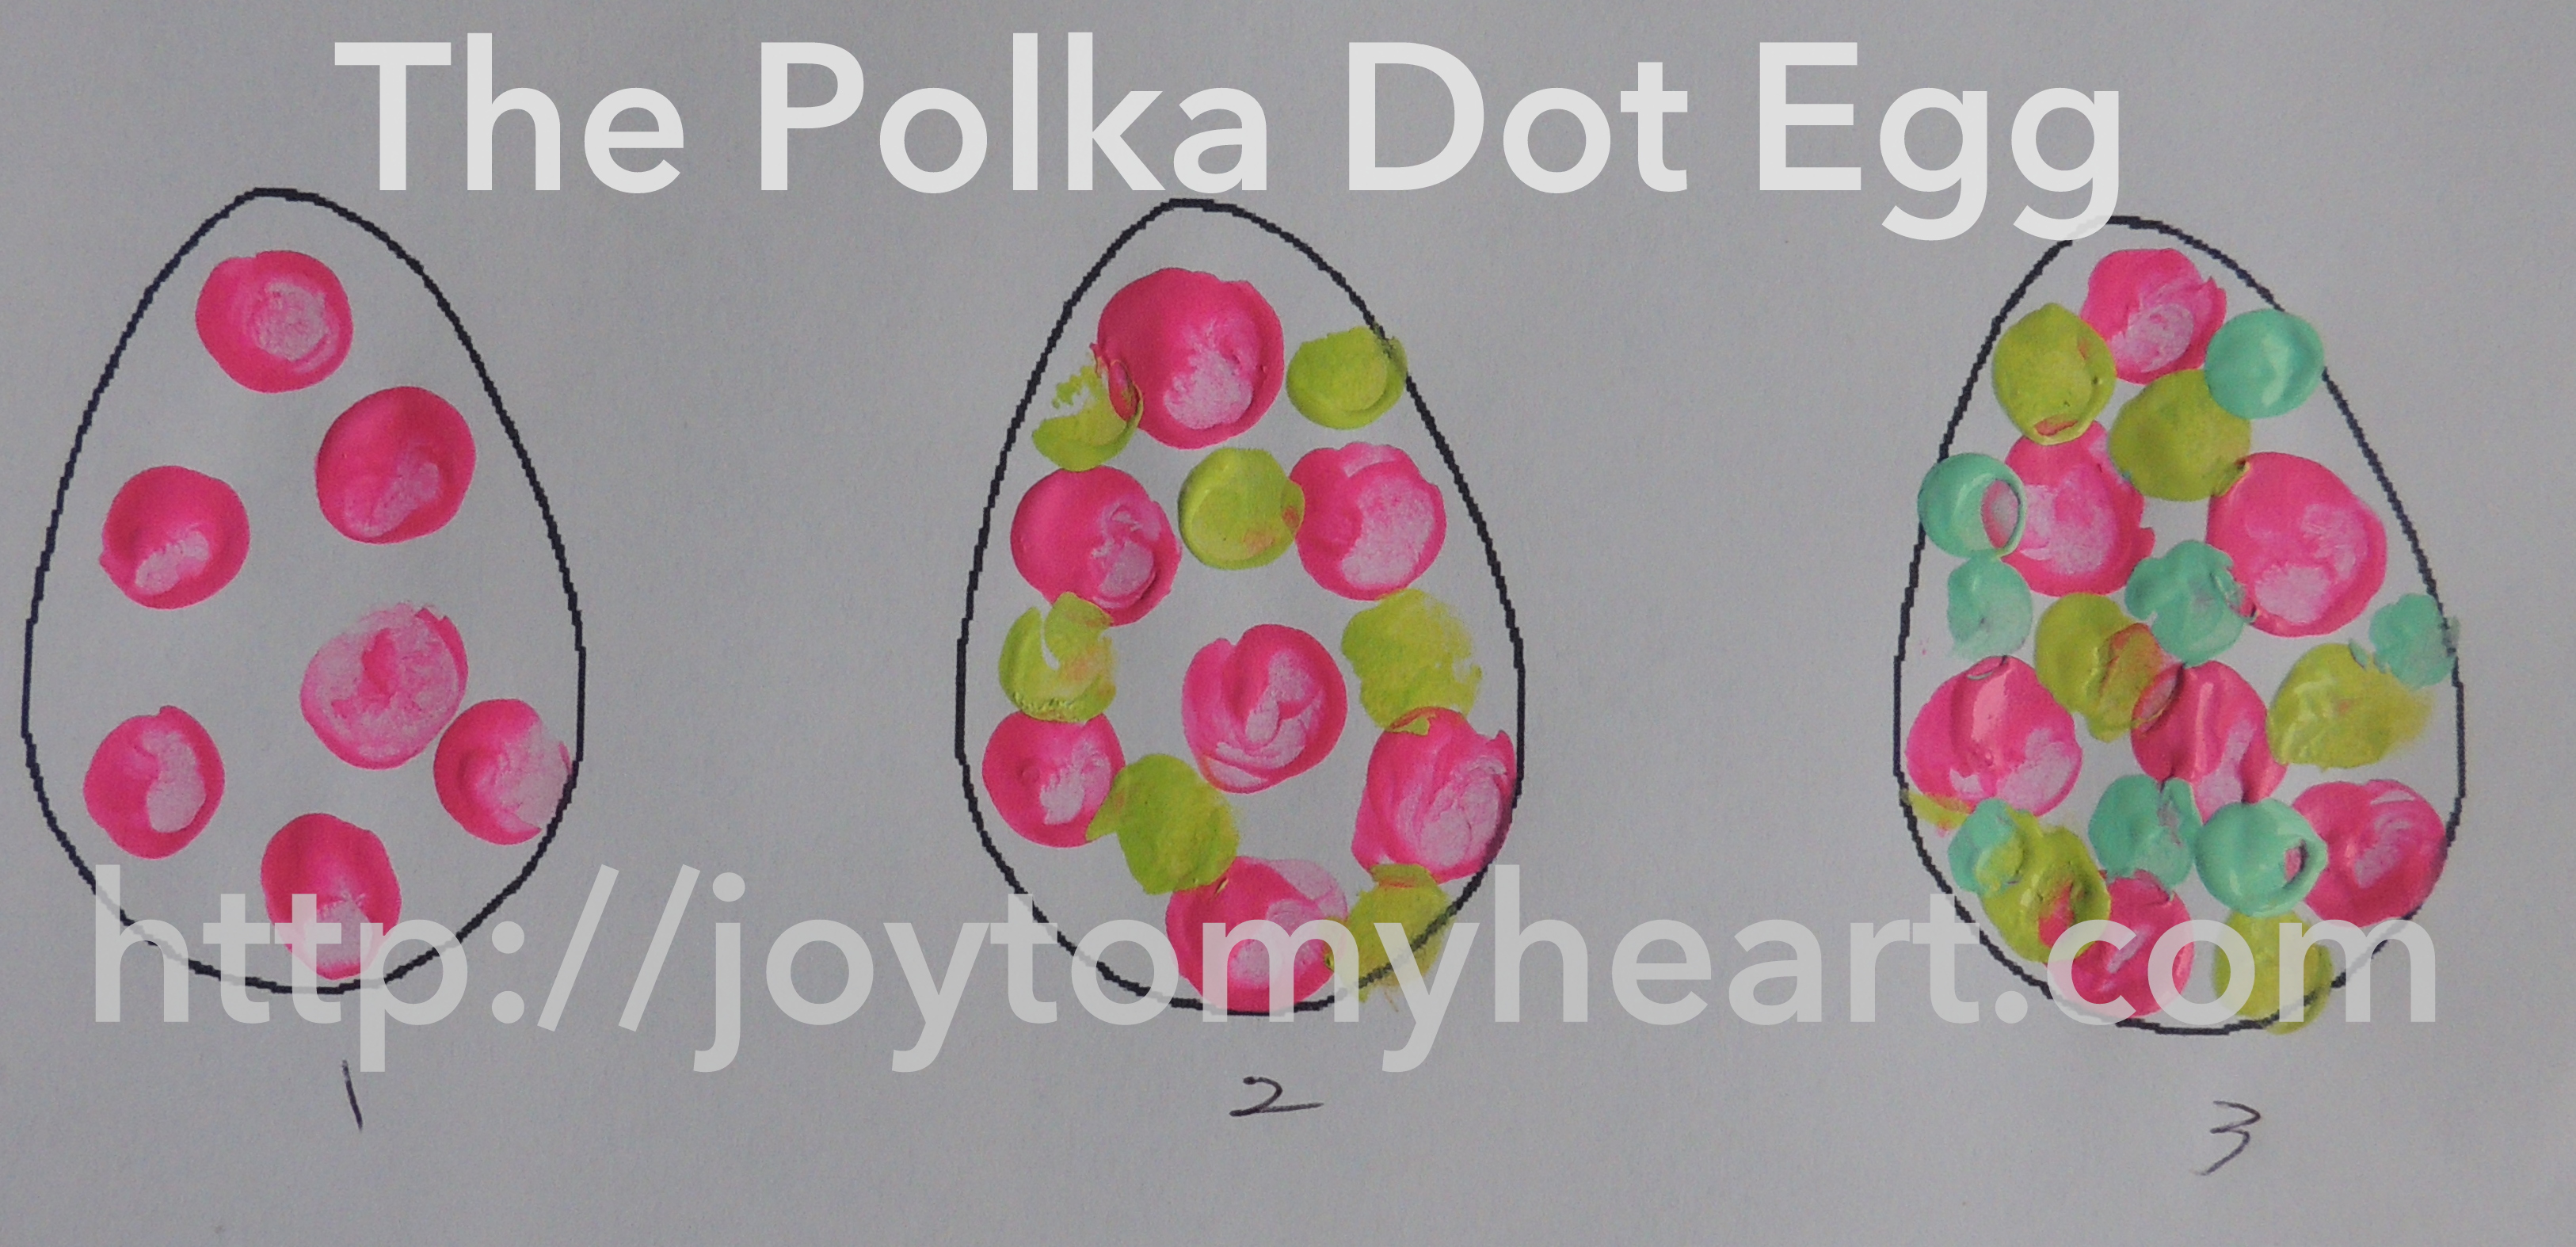
I love these polka dots. I used a pencil’s eraser dipped into my paint to make them. You can swirl the eraser around on the egg, to make it larger or smaller. How hard is that? And any color combo looks great!
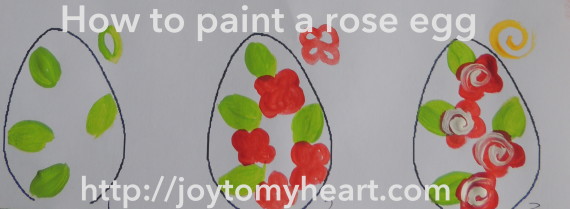
This rose is a fav of mine. Begin with oval shapes for the leaves. Then 4 little circles joined and filled in with paint become the rose. Curls make the center of the rose. 3 simple steps.
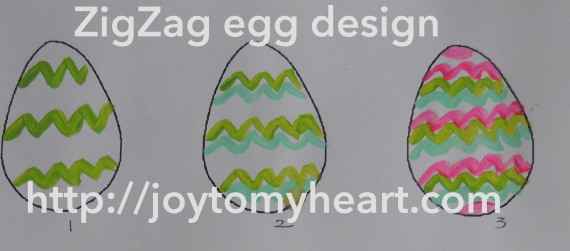
This is easy. Just paint you zigzag as big, thin, thick as you like and add to it as many colors as you like.
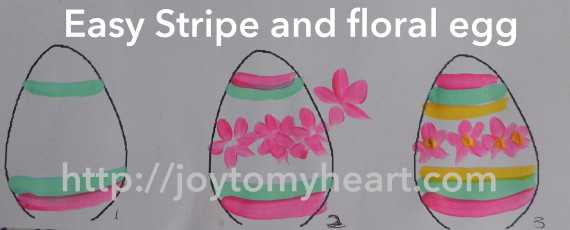
Traditional Easter eggs have stripes and flowers. This is just stripes with a row of flowers ~ same as the ones you painted above.
It takes only 3 steps to complete each design. I painted the shapes beside the eggs to show you what I did on some of them. You will want to paint one side at a time and allow it to dry in between to keep from smudging.
Remember! This is art, it doesn’t have to be perfect!!!
I do hope you will take the time to make your own Hand Painted Easter Eggs that you can keep and enjoy for years to come. I certainly enjoy mine. And if you missed the instructions on emptying your eggs to paint them, you can find my detailed instructions here!


3 Comments
Lovely.I have an old birdbath,but it has no drainage,what can I do with it?
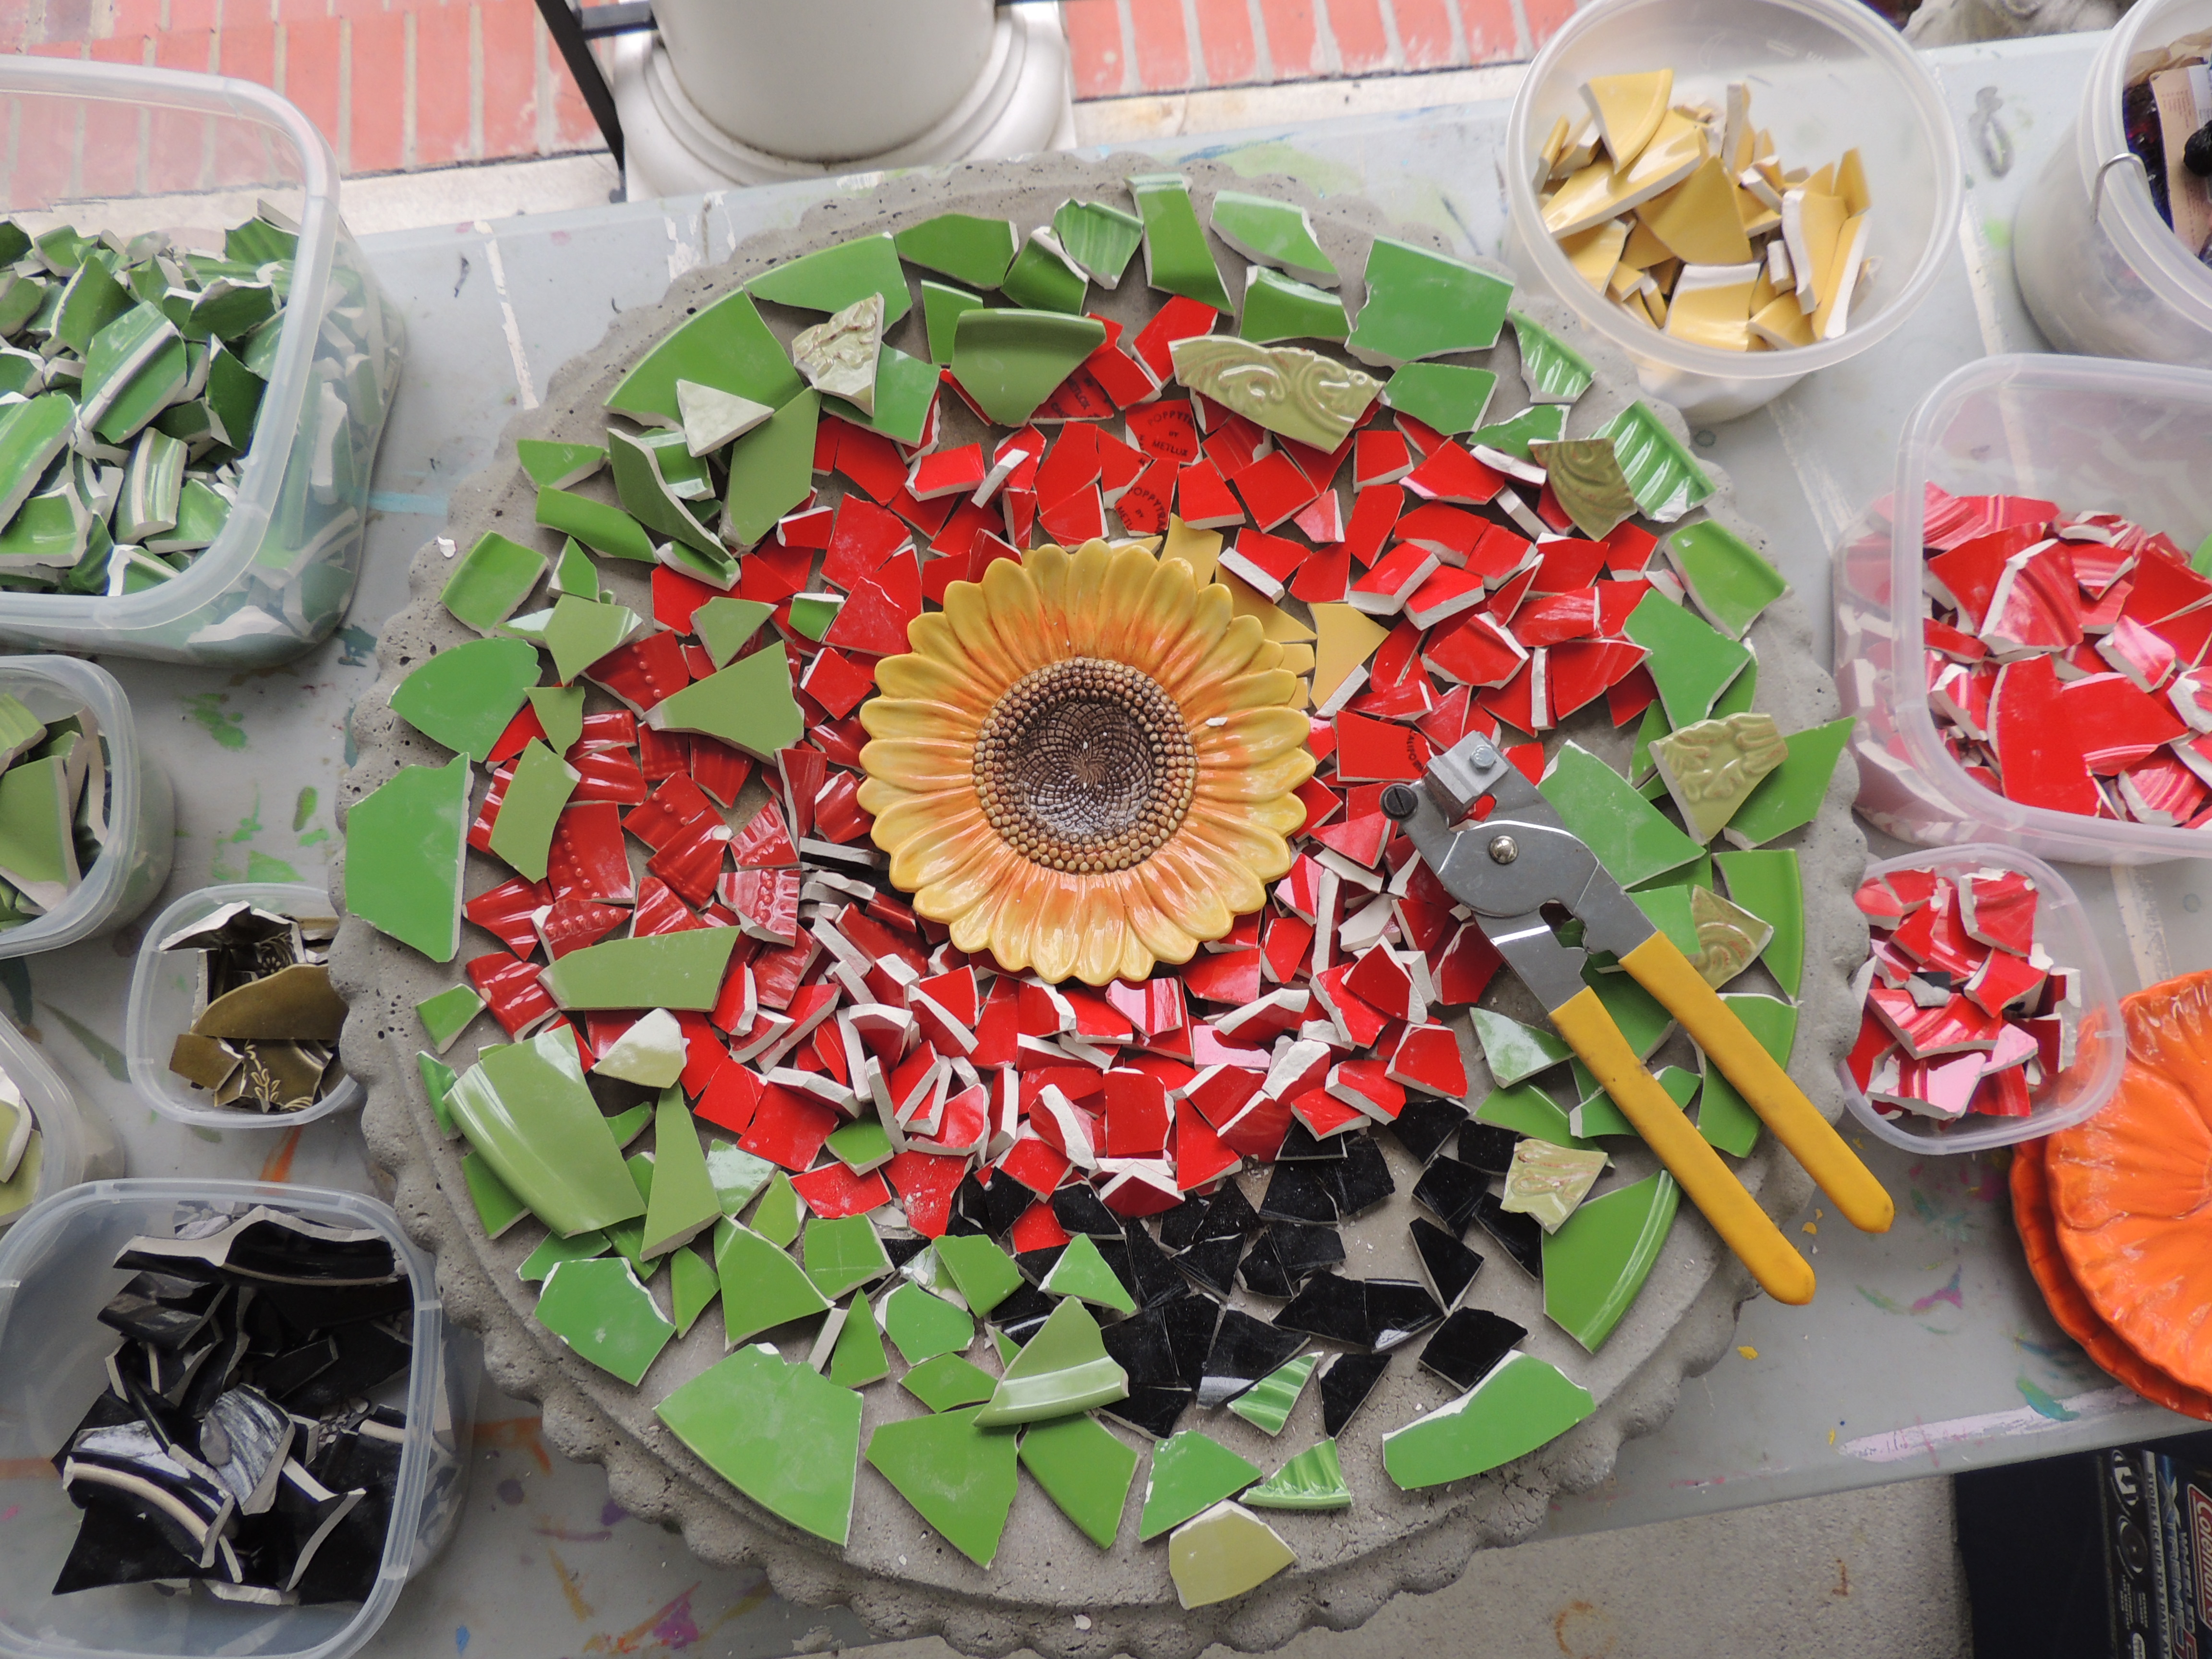
May 31, 2014 at 9:07 pmSearch for my post on Mosaic Birdbath…. that’s what I do….. 😉 OR You could set pots that have drainage holes, inside your birdbath, plant trailing flowers like petunias and ivy in them and use it as a planter that way. I’ve done that, in mine, to have something taller in the center. Let me know what you decide….either way I like having a planter that I can stand up to plant and tend…. 🙂
May 31, 2014 at 9:27 pmThis is something New !
January 30, 2021 at 11:44 am